
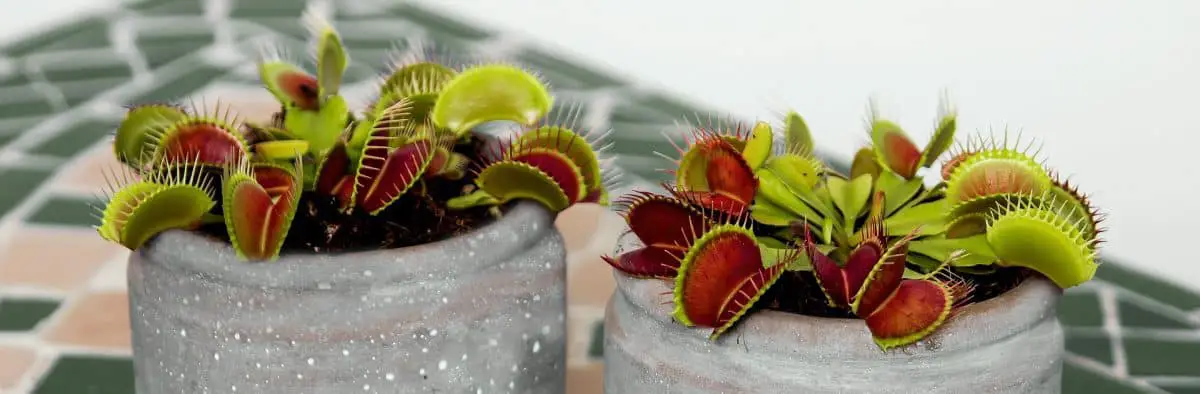

Potting a Venus flytrap in the right container can make a huge difference. I have grown Venus flytraps in my home for several years. In this article, I will share the best potting and repotting techniques for Venus flytraps.
The best potting containers for a Venus flytrap have proper drainage and are made up of plastic, glazed ceramic, or Styrofoam. Venus flytraps prefer individual containers with a depth of at least 6 inches. It is beneficial to repot these plants every year to avoid common issues such as ground compression, root rot, or overcrowding.
This guide will take you through the process of potting or repotting your Venus flytrap. I will share some key advice to keep your plants healthy.
Here is a short summary on some important aspects:
| Recommended repotting frequency | Transplant your Venus fly trap into fresh soil once a year. Avoid repotting more than once a year. |
| Best time to transplant | At the end of dormancy, 2-3 weeks before the temperatures start rising |
| What do you need to plant a Venus fly trap | Carnivorous plant soil, a pot, and pure water |
| What soil to use | Always use carnivorous plant soil with peat or sphagnum moss |
| What pot to use | Any tall plastic or glazed ceramic pot that has at least 4 inches in depth and drainage |
| What water to use | Use distilled, reverse osmosis, or rainwater exclusively, never use tap or bottle water |
Basic Elements for Potting Venus Flytraps
First, let’s start by collecting the basic materials:
- A Pot (these pots are great for Venus flytraps: https://amzn.to/3IYVGKU)
- Carnivorous plant soil (you can make it or buy it online: https://amzn.to/3s0VZSO )
- Your Venus flytrap
- Pure water
Venus flytraps are intolerant to nutrients and minerals. Therefore, we will choose specific pots, soil, and water that is nutrient-free and mineral-free.
The water for carnivorous plants can be tricky. Venus flytrap can only be watered with pure mineral-free water, which can be any of these options:
- Distilled water
- Reverse osmosis water
- Rainwater
Make sure to buy (or collect) a jug of suitable water for your Venus flytrap before you get started. You will need it during the potting process and right after too.
If you already have all the materials, feel free to skip to the later sections.
Venus Flytrap Potting Container
Follow this considerations when selecting a container for your Venus fly trap:
| Suitable materials | Glazed ceramic, plastic, glass, styrofoam |
| Unsuitable materials | Concrete, unglazed ceramic, clay, terra cotta, metal |
| Diameter | 3-6 inches for single plants, 6+ inches for multiple |
| Depth | 4 inches is the minimum recommended depth |
| Drainage | Must contain drainage holes |
| Color | Avoid black pots in extremely hot locations |
| Airflow | Avoid closed containers, such as terrariums and domes, at all costs |
Material
You can employ a variety of different pot containers for your Venus flytrap. Here are some common choices:
- Plastic
- Styrofoam
- Glazed ceramic
- Metal
- Glass
The best pot materials for Venus flytraps are plastic, styrofoam, or glazed ceramic pots. These materials provide insulation from the environment, which helps you avoid exposing your plant to extreme heat or cold. Also, they do not leak any type of minerals to the soil. It is not common to find styrofoam plant pots, but some people repurpose styrofoam cups as pots for small plants. They are an inexpensive option and they provide the best insulation.
Metal and glass pots are acceptable containers. They do not leak any type of element to the soil, but insulation can be a challenge. Make sure to avoid extreme temperatures if using metal or glass pots.
Terracotta and unglazed ceramic or clay pots are not suited materials for Venus flytraps. These materials tend to leak minerals to the ground which can harm Venus flytraps. It is possible to use them, but the recommendation is to employ older pots that release less or no minerals due to the previous usage.
If you would like the exact Venus fly trap pot recommendations I use and a guide to select the best containers, check this article.
Drainage
Venus flytraps require a moist environment to live. They need to be watered very often and as a result grow better in pots with drainage.
Make sure the pot has at least one drainage hole or consider adding one of necessary.
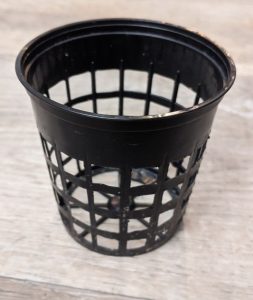
The plastic net pot in the images below is a useful option for Venus flytraps. It works best when employing sphagnum moss as the potting media. The net pot can be placed on a shallow water container to provide enough humidity and water the plant from the bottom.
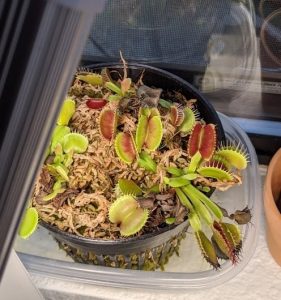
It is possible to grow Venus flytrap is a container without drainage, like a terrarium for example, but it is challenging to do so. As a beginner carnivorous plant grower, I wouldn’t suggest experimenting with terrariums just yet.
Pot Size
Choose a pot that matches the size of the Venus flytrap. The plant can restrict its growth due to a very small container and overly large pots are also not recommended. An adult Venus flytrap growth best in the following dimensions:
- Pot diameter: 4 to 5 inches (10.5cm – 12.7 cm)
- Optimal pot depth: 6 inches (15.24 cm)
Young Venus flytraps that are only 1 to 2 years old can live in 2 to 3 inches in diameter. The depth of the pot, however, should be more than 4 inches.
Potting Soil
Now, let’s select an appropriate potting medium. Venus flytraps can’t grow in standard compost or soil, due to the richness in nutrients. Instead, employ a mixture of these elements:
- Long fibered sphagnum moss
- Peat moss
- Perlite
- Silica sand
To make Venus flytrap soil combines one type of moss with a draining agent (sand or perlite). For example, you can employ a 2:1 ratio of peat moss and perlite. Or a 2:1 ratio of long-fibered sphagnum moss with sand. The ratio depends on personal preference, but a 2:1 or 4:1 ratio are common choices.
It is acceptable to employ pure peat or sphagnum moss as the ground for Venus flytrap. However, it is encourage to add sand or perlite to provide better drainage and aeration.
Important Consideration: When you buy any of the materials above, make sure they are pure. Some suppliers (like miracle grow) offer enriched peat moss instead of pure peat moss. Any enriched version will bring too many nutrients to your plant.
Where to buy Venus flytrap soil?
Sometimes it is difficult to buy pure moss in standard gardening stores or nurseries. As an option, you can buy carnivorous plant soil online. It usually contains exactly the same elements I outlined in this section, but they go through the trouble of mixing it and ensuring the lack of nutrients. Search for carnivorous plant soil in Amazon or Etsy to find some good options.
How to Pot a Venus Flytrap
Follow the steps from the video or the instruction list below to pot a Venus flytrap:
- Collect the appropriate water, soil, and pot we discussed in the previous sections.
- Place the soil in a container and moisten it with the water until it is almost saturated.
- Place the soil inside the selected plant pot.
- Make a vertical hole in the center of the ground. Try to make a hole that is at least 3 inches in depth.
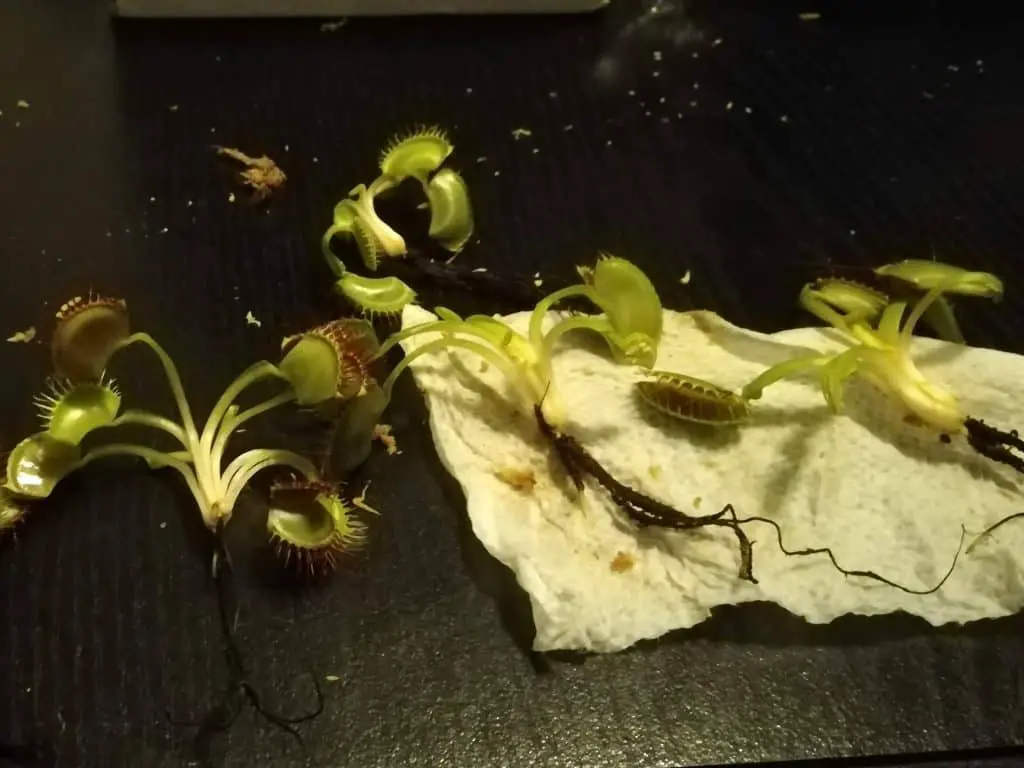
- Carefully grab the Venus flytrap from the top of the bulb. The image below shows some bare-root Venus flytrap I ordered online. The bulb is the white area of the root. The black roots are strong, but the bulb can be quite delicate, do not picture it or press it too hard.
- Introduce the roots of the plant in the hole
- Make sure the center of the bulb will be underground. The bulb is very sensitive to light and extreme temperatures. It should always remain underground.
- Use your finger to push the soil together and tighten the plant.
- Water the plant slightly to make sure the soil is moist, but not swamped. You can use a misting bottle to avoid moving the ground.
- If the plant was shipped to you, it has been in a dark box for a few days. Slowly introduce it to some sunlight. Start with a few hours of light and progress into an optimal amount of 12 hours.
- In the next weeks, avoid additional stress to your plant. Do not feed it, do not fertilize it, and do not play with the traps. It takes the plant a few weeks to settle in the new environment.
- You did it! Now, follow all the Venus flytrap care considerations to keep the plant healthy. Here is a complete guide on Venus flytrap care Instructions.
When to Repot a Venus Flytrap
Consider repotting your Venus flytrap once a year to avoid soil compression and promote growth in the brand new soil. Still, do not take this advice as a strict rule. Overall, never attempt to repot a Venus flytrap when it is sick or weak.
Some specific conditions might force you to repot a Venus flytrap. Like for example these:
- You have noticed black spots in the bulb of your plant, which is a clear sign of root rot. Root rot expands through the roots and eventually kills the plant. In this case, repotting is mandatory. Also, it is necessary to extract the rotting portion of the root.
- You have used the improper water type, such as tap water or bottled water. Unfortunately, once you used the wrong water source, the soil will hold the extra minerals for several weeks. During that timeframe, the Venus flytrap will lose leaves due to mineral-burn and can die.
- The soil has nutrients, and it is killing your plant. It is impossible to keep a Venus flytrap in standard plant-soil without killing it. It is crucial to change the potting medium immediately.
- Fungus or mold are growing in the potting media
Pro Tip: An optimal time for repotting is at the end of dormancy. Venus flytraps undergo dormancy during the winter. And it lasts 2-3 months. Consider repotting your plant during the last month of dormancy. Then, the plant will exit dormancy and start to flourish in brand new soil.
How to Repot a Venus Flytrap
Follow these steps to repot a Venus flytrap:
- Gather fresh soil and water
- Take your plant (still in the pot) and water the soil lightly to loosen it up
- Carefully break up the soil on the edges of the pot until it is no longer attached.
- Remove the Venus flytrap from the pot. When the plant is out of the container, you will be able to see the roots with soil attached to them.
- Patiently remove the soil within the roots and the bulb. You can employ more water if you find it easier to remove moist soil. The roots are delicate, but they can withstand the human touch.
- Once all the soil is removed, examine the plant, especially the roots. Sometimes a single Venus flytrap divides into multiple plants. In that case, separate the plants and place them in independent containers. Most Venus flytraps only produce 6 to 10 leaves at a time, a plant with more than 10 traps has likely propagated.
- Use small scissors to trim any dead foliage. When potted, it is difficult to prune Venus flytraps without activating the traps or harming other leaves. Take advantage of this opportunity to prune your plant.
- Place the new soil in a mixing container.
- Combine the soil with some water until the soil is humid.
- Place the humid soil in the same pot or a new one. If using the same container, rinse the pot thoroughly.
- Make a deep vertical hole in the center of the ground.
- Grab the Venus flytrap from the top of the bulb and carefully introduce it in the aperture. Try your best to place the roots in a vertical orientation. Also, make sure the bulb is underground.
- Push the soil surrounding your plant together and tighten the plant in the ground.
- Add some extra water to the plant and make sure the soil is moist, but not soaking wet. Pour water slowly or use a bottled mister to prevent shifting the soil.
- In the next weeks, please treat the plant with extra care. It takes the plant a few weeks to adapt to a new environment.
- Finally, continue to follow all the care considerations for Venus flytraps.

What to Expect After Potting and Repotting Venus Flytraps
All plants take some time to adapt to a completely new environment. During the following weeks after potting or repotting a Venus flytrap focus on providing good care. Here are a few key considerations to implement:
- Provide enough water to keep the soil humid at all times.
- Set the plant in a strategic location with enough exposure to sunlight.
- Avoid activating any of the traps. Closing and opening the traps for no reason, waists a significant amount of the plant’s energy
- Skip a few feeding and wait until your plant has fully recovered before feeding.
- Do not fertilize the plant. Generally, fertilizing carnivorous plants is an advanced procedure, it must be done carefully and at the right time.
Even though a Venus flytrap weakens during repotting, it will only be down for a few days or a couple of weeks. But, setting it is fresh soil will bring many benefits, like the following:
Promote growth: When soil is set in a pot for months or years, it compresses, especially if watered from the top. The roots in Venus flytraps struggle to break up the ground and the plant’s growth slows down.
Avoid root rot: Older soil, not only compresses but starts holding more liquid. The increased humidity can ultimately cause root rot. Venus flytraps thrive in moist environments, but they do not benefit from standing water. Without proper drainage, the water stays within the ground for too long and poses the risk of rotting.
Separate multiple plants: Venus flytraps employ multiple methods to reproduce. For example, they produce flowers during the spring, which when pollinated create seeds. Also, Venus flytraps create root bulbs for reproduction. When the conditions are adequate, a Venus flytrap starts dividing and creating more plants. It is not mandatory to separate those plants. But, growing independently gives them more room for growth and development.
Summary: Potting and Repotting Tips
I hope this guide has provided enough insight and detailed instructions to guide you through the potting and repotting process of Venus flytraps. Venus flytraps are beautiful and fascinating plants. But, they do have some strict growing requirements. Just in case you missed one of the highlights, here is a summary of the main takeaways from this article:
- Employ plastic, styrofoam or glazed ceramic pots
- Pots with drainage holes are the best option
- Do not employ standard soil. Venus flytraps can only live in a nutrient-free medium.
- Have distilled, reverse osmosis or rainwater for potting. And always water Venus flytraps exclusively with these types of water.
- Only repot a Venus flytrap when it is healthy. The strain from repotting can kill a weak Venus flytrap.
- Repot the plant immediately if it is at risk of dying due to root rot, improper soil, or water source.
- The best time to repot a Venus flytrap is at the end of dormancy. Follow the link to learn more about the dormant period.
- Avoid triggering the traps while handling a Venus flytrap