Reasons Why Venus Fly Traps Are Not Opening With Solutions

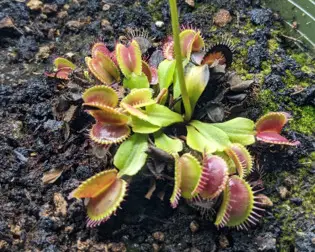
The traps of a Venus fly trap will open and close through the plant’s life. However, occasionally, a leaf might remain close for an extended period. In this article, I will explain why a trap will not open and how to fix this in the future.

The traps in a Venus fly trap won’t open when the plant is digesting an insect, or the leaf might be at the end of its life. Improper feeding can cause the leaf to stay close and eventually die. Also, a leaf reaching the end of life early could be due to stress or unsuitable growing conditions.

Now, let’s explore in detail the main two reasons why Venus flytraps won’t open:

  • The trap has reached the end of life
  • The Venus fly trap is digesting a meal
Venus Flytrap With One Closed Leaf

The Leaf Has Reached End of Life

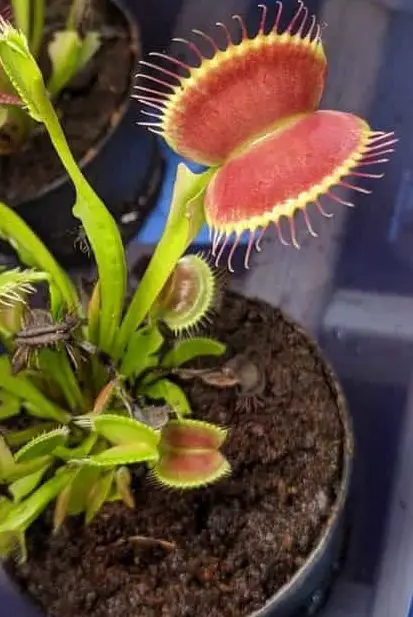
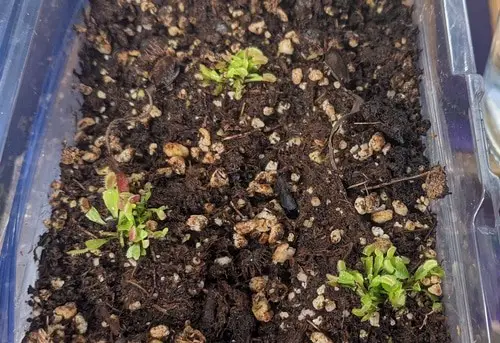
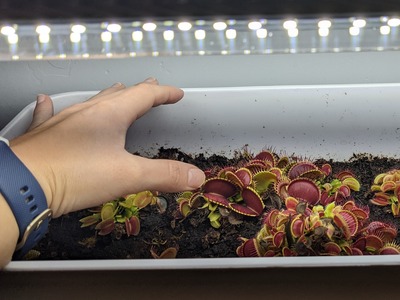
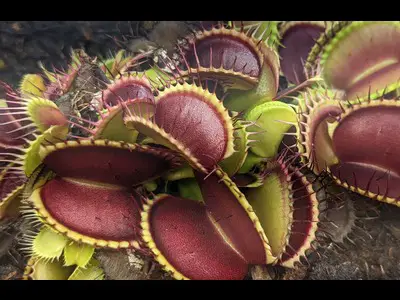
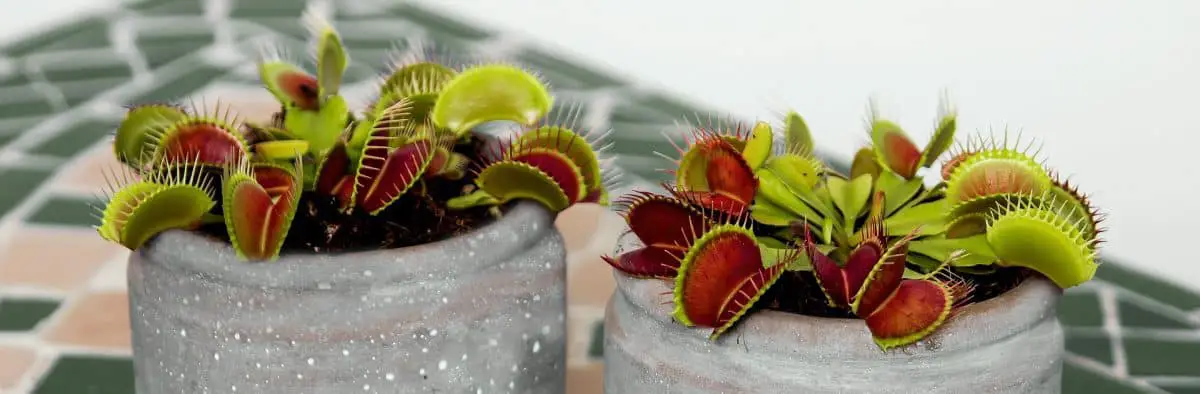
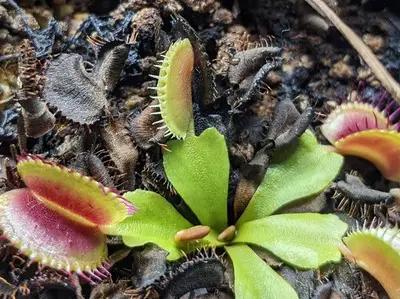
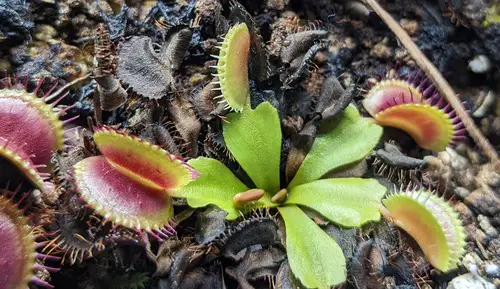
Each Venus fly trap plant has several leaves. One plant will usually have 3 to 8 leaves. Each of those leaves has a trap that can close and reopen multiple times. However, the number of times the trap can close is limited.

After the leaf has close a finite number of times, usually about five times, the leaf will reach the end of life.

A trap can dry up and die at any point due to age, but activating the leaf multiple times will exhaust the leaf and eventually kill it. Sometimes, it can be very beneficial for the plant to close. If the plant captures a bug, the benefit outweighs the negative side of potentially losing a leaf.

Venus fly trap leaves will reopen after 2-12 hours when triggered by something, but they do not consume prey.

A plant not digesting something will reopen shortly unless the leaf is exhausted and might remain closed and wither.

Here are some tips to avoid causing stress to your plant and losing leaves for no good reason.

  • Avoid triggering the traps from your plant to close
  • Do not cause stress by repotting often; a yearly repotting is enough
  • Grow your plant far away from pets and people that might cause stress and play with the leaves

I do not worry when a leaf remains closed and starts to turn black. It is its natural process. However, you must keep an eye on and confirm that your plant is not losing all its leaves. This article can help you with info on black leaf prevention.

The Venus Fly Trap Is Digesting a Bug

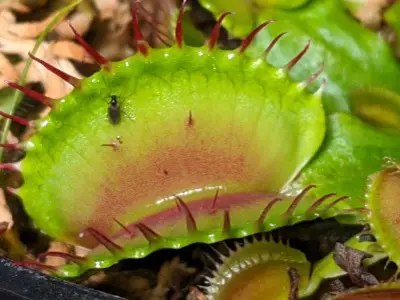
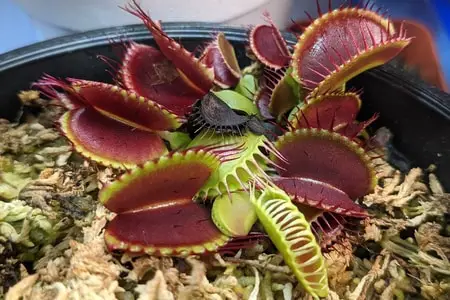
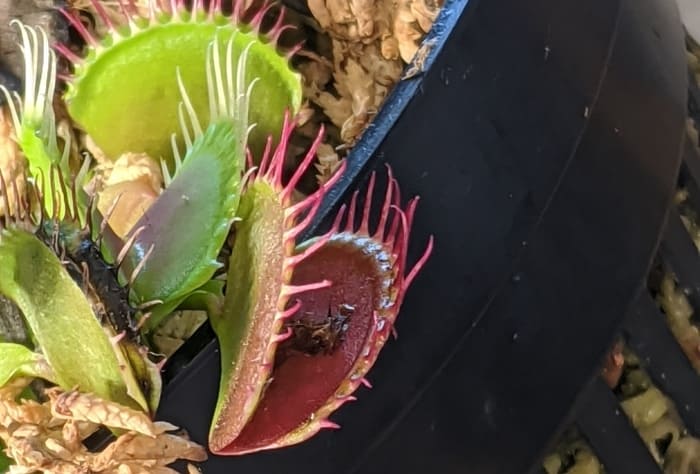
In most cases, Venus fly traps will be closed because they are digesting an insect. Venus fly traps lure insects with their bright colors and the sweet nectar they produce inside their traps.

If a bug triggers the traps, the leaves will close (hopefully), capturing the prey.

Once a Venus fly trap captures an insect, the leaf will take some time to extract critical nutrients.

As a general rule, it takes 1-2 weeks for Venus fly traps to digest an insect after closing its trap. Larger insects will require up to three weeks to digest. After the plant extracts the nutrients, the leaf will reopen to capture more insects.

In most cases, Venus fly traps will capture insects and take a few weeks to dissolve the soft parts of the bug. Then, they reopen, exposing the remains of the prey. However, in some scenarios, the plant might remain closed for extended periods or lead to a black leaf.

These are some common causes why a leaf will stay closed:

  • The Venus flytrap is digesting an insect that is too large in size
  • The plat is eating human food
  • The insect inside the trap is hard to digest
Venus flytrap poop food waste
Venus fly trap leaf reopening after digesting an insect

The Leaf Its Consuming a Large Bug

Venus fly traps are built to consume bugs that fit within their traps.

When a bug is too big, the plant cannot fully digest it. After extracting some nutrients, the leaf will eventually give up, stay shut, and start turning black.

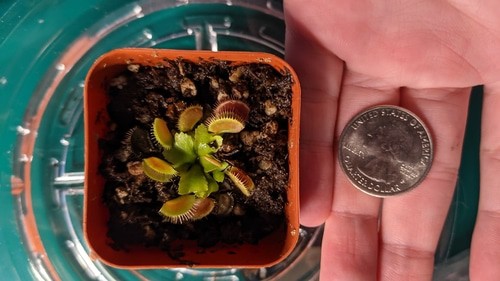
As a general rule, when feeding a Venus fly trap, you must select an insect no larger than 2/3 of the size of the trap. Smaller insects work well too!

The Trap Is Consuming a Difficult-to-Digest Insect

Some insects are just more challenging to digest. Beetles with hard shells, for example, can cause some stress to the plant.

When a Venus fly trap cannot digest a specific bug due to its size and composition, it will often abandon the task and let the leaf wither.

To prevent this from happening, consider employing nutritious but soft bugs for easy digestion for feeding your plant. This guide contains a complete list of what to provide and not to feed your plant.

The Plant is Eating Unsuitable Food

Finally, another common mistake that can cause a leaf to stay close and die is using incorrect food.

Venus flytraps should never attempt to consume human food. Cheese, fruit, beef, chicken, candy, sausage, blood, or any human food is unsuitable for carnivorous plants. Venus fly traps won’t be able to break those foods down; the leaf will turn black and wither.

Leafs can stay shut with rotten food inside for long periods. I recommend cutting the leaf off and throwing it away. Rotting matter can attract mold and pests.

Feeding Venus Flytrap Tips

If you own a Venus flytrap, you might be interested in feeding it. You can find a short overview below and a complete guide here: Venus Fly Trap Feeding Guide with Photos.

When feeding a Venus flytrap, employ bugs that can fit inside a trap and drop the insect in between the trap’s lobes. They can consume dead or live prey, but feeding with dead prey adds complexity.

The feeding process is not too hard, but you must follow the instructions below to avoid harming your plant. For example, overfeeding can damage the plant.

Venus flytraps growing outdoors often capture their own food and do not need to be fed.

Generally, feed your Venus flytrap once every two to six weeks by dropping the bug inside the trap. Use a single bug and feed only one trap of the entire plant. The insect must be small enough to fit inside the trap.

To avoid losing leaves due to improper feeding, follow these tips:

  • Outdoor Venus flytraps do not require feeding
  • Feed your plant once every 2 to 6 weeks
  • Only feed insects or spiders to your Venus Flytrap
  • The insects must fit inside the trap
  • Do not feed your plant during dormancy
  • Baby Venus flytraps do not need to be fed

Key Reasons Venus Fly Trap Won’t Close Plus Easy Fixes

Venus fly traps are known for trapping insects with their leaves. They possess a mechanism to close their leaves and capture prey that provides vital nutrients. In this article, you will learn why Venus flytraps won’t work, meaning why they do not close their leaves.

Venus fly traps won’t close their leaves because they are either dormant, sick, or their leaves are exhausted. Dormancy is a natural process that does not affect the plant’s health. However, the leaves not closing can be a sign of poor health.

I have grown carnivorous plants for over five years and Venus fly traps for the same time. Here is a quick summary of possible causes for your plant not to close; keep reading to go step by step to figure out why your plant is not working and how to fix it.

Dormancy: the plant is dormant.Venus fly traps go into a hibernation stage during the cold winter months. When Venus fly traps go dormant, their traps often stop working altogether.
The leaf is exhausted.Each leaf in a Venus flytrap can only open and close a limited number of times. After the leaf has closed a limited amount of times, it will stop working.
The Venus Flytrap is sick.When venus fly traps are experiencing some type of distress, like incorrect growing conditions, they will adapt to preserve energy. In those cases, their traps might stop working as their main focus is not capturing bugs, but surviving.
Common Reasons Why Venus Flytraps Won’t Close

First, let’s start by learning how Venus Fly traps work and what you must do for the leaves to close.

How Venus Fly Trap Work and Close Their Traps

In the wild, Venus fly traps attract bugs with their bright colors and the sweet nectar they secrete in their traps. Once an insect has arrived at the trap, it just needs to trigger the trap to close.

Each trap is made up of two lobes. In the interior part of the lobes, you will find three trigger hairs in each. They are thin filaments. When in contact with a certain amount of movement, the trap closes.

trigger hairs venus fly trap
Trigger hairs inside the lobes

If a bug or you stimulate the trigger hairs inside the trap by touching them twice within a short period (usually 5 seconds), the plant closes. You need to touch the trigger hairs twice in a row. There is no need to touch all the trigger hairs; just one should be enough to activate the trap.

Venus flytraps employ large amounts of energy, activating their traps. The double stimuli mechanism is critical to saving the plant’s energy and livelihood. Each leaf requires two consecutive stimuli to close.

After the appropriate stimuli, a trap closes in a snap of a second, hopefully (for the plant) capturing the victim. The lobes come together while the cilia in intertwined, but the leaf if not wholly shut at first. The traps close in two stages

First, the lobes come together, but they do not close completely. At this point, the plant is waiting for further stimuli: movement within its semi-closed trap. Without further stimuli, the plant reopens after a few minutes/hours.

If the trap receives further stimuli, the trap closes completely and starts digesting the insects.

The Venus Fly Trap Is Dormant

Venus flytraps go dormant during the winter months. Dormancy is a period of inactivity when the plant rest and recovers. it is very similar to hibernation.

When venus fly traps are dormant, their traps often stop working. Since the plant is inactive, it does not have any interest in capturing prey.

A venus fly trap not working due to dormancy is completely normal and shouldn’t be a concern.

How do you know f your Venus fly trap is dormant?

Venus fly traps go dormant in the winter after exposure to temperatures under 45 F (7 C) for two to three weeks. Once venus fly traps enter dormancy, they usually lose some leaves and start looking down.

The Easiest Fix: No fixes are needed; just make sure your plant experiences dormancy every year

Dormancy is not a concern; it is actually a very normal process that is needed for the plant’s health. Venus fly traps must go dormant every year to stay healthy. If your plant is dormant or you need to learn more about the process, read this article on Venus fly trap dormancy and care during dormancy.

The Trap Is Exhausted and Dying

Each Venus fly trap will grow multiple traps, usually 5 to 7 traps. Each of those traps has a limited capacity for opening and closing. Once the trap has reached its limit, it will stop working.

This can be a concern in some cases, while in others, it is a completely normal process. Let me explain…

Leaves will become exhausted naturally if they are triggered multiple times by insects, the wind, or even a human plating with the traps. It is common that when Venus fly traps are shipped in the mail, their traps are closed, and they might reopen but never close again. Due to the stress of the trip, the traps might have closed multiple times and become exhausted.

If you notice one or two traps are exhausted, and they won’t close, but the other traps are working fine. You shouldn’t worry. Your plant is not sick, but only a couple of leaves are exhausted. After they stop working, they will likely turn black. Don’t worry; they are just withering. After they dry up, new growth will be spurring too.

Sometimes leaves wither due to their natural lifecycle, but in other cases it is 100% preventable. Here is a complete list of the most common causes for black leaves plus prevention.

venus fly trap not closing working
Venus Flytrap: An exhausted Leaf

The leaf in this picture is fully opened outwards. When leaves look like this, it is a sign they are exhausted. It is an older leaf that has just closed enough times.

younger traps that are ready to close will have the lobes closer together.

The main issue arises if none of the traps are working and the plant is not dormant. In that scenario, I recommend reading the next section. Your Venus fly trap might be unhealthy.

Easy Fix: Avoid stress and triggering traps

Venus fly traps spend substantial amounts of energy controlling their traps. trigger the traps for no reason will cause a lot of stress and stress the traps. Avoid triggering the traps with your fingers to save your plant’s energy.

Also, try to avoid exhausting any type of stress that could trigger the traps without benefits. For example, your pet might be playing with the plant, or a curtain might be touching and triggering the plant.

Activating the leaves won’t kill the plant but will eventually make the leaves turn black. Doing this constantly can pose a significant burden to your carnivorous plant.

Your Venus Fly Trap Is Unhealthy

When venus fly traps are unhealthy, they start to suffer greatly. In some cases, they might become deformed, lose their colors, and their traps can stop working altogether. To grow healthy leaves again you can follow these instructions.To grow healthy leaves again you can follow these instructions.. If you notice your plant is not working and it is looking down, make sure you check your plant’s health.

Unhealthy Venus fly traps are not interested in capturing bugs. Venus fly traps extract most of their energy from the sun through photosynthesis. Capturing insects is just a supplement. When the plant is in distress, it deprioritizes capturing insects.

Here is a list of common mistakes made when growing Venus fly traps. Do not worry if you have made one or multiple; there is a fix for all 😉

  • The soil is not carnivorous soil and it is poisoning your plant
  • The water you use is not mineral free
  • The plant needs more light
  • The venus flytrap has too much or too light water
  • The feeding is out of control
  • Extreme heat exposure
  • Too much stress
  • The fertilizer is unsuitable
  • Your plant is not eating any bugs
  • There is a pest infestation
  • The Venus fly trap is suffering from root rot

This one of my articles covers all these growing mistakes and how to fix them: Common reasons Your Venus Fly Trap Is Unhealthy + Fixes.

The Fix: Adjust the environment of your plant

Go over the care instructions below and find the reason(s) why your plant might be struggling. Adjust the conditions as needed to bring your plant back to health. After your plant recovers, it will start looking healthier (brighter colors, larger leaves), and the traps should start working again.

  • Light: Partial or direct sunlight for at least six hours a day. Not enough light will affect the traps and eventually kill the plant.
  • Water type: Only water with pure water: rainwater, distilled water, or reverse osmosis water. If you used the incorrect water type, consider changing the soil as it might have mineral build-up.
  • Watering frequency: Water frequently to keep the soil moist at all times but not saturated
  • Soil: Only employ nutrient-free soil. Pure sphagnum moss or peat moss are viable options. Using the incorrect soil is very risk; swap the soil if you make a mistake.
  • Feeding: Venus flytraps do not need bugs to survive, but access to feed promotes their growth.
  • Pot Dimensions: Choose pots that match the size of the plant: 2 inches – 6 inches in diameter. And always employ deep pots (7 inches)
  • Pot Materials: The best-suited materials are plastic, Styrofoam, and glazed ceramic.
  • Repotting: For best result, repot Venus flytraps once a year (here is a guide on how to pot your plants)
  • Trimming: Remove black leaves by cutting them from the base with scissors.
  • Temperature: Venus flytraps can withstand high temperatures of up to 95 F and cold temperatures close to freezing
  • Humidity: Venus flytraps can adapt to arid climates, but they benefit from high-humidity environments.
  • Fertilizers: There is no need to fertilize Venus flytraps.
  • Dormancy: Venus flytraps go dormant during the winter for 2-3 months.
  • Terrariums: Venus flytraps can grow in a terrarium. However, close terrariums limit their access to insects and their exposure to suitable temperatures for dormancy which can end up harming your plant.

Feeding a Venus Fly Trap

Now that the traps in your plant are working again, you can think about feeding bugs to it.

When feeding a Venus flytrap, employ bugs that can fit inside a single leaf and drop the insect in between the trap’s lobes. If the insect touches the trigger hairs twice in a row the trap will close capturing the prey.

Venus flytraps growing outdoors often capture their own food, whereas Venus flytraps growing indoors often struggle to capture bugs. It is not a requirement to feed your plant as the nutrients extracted from bugs are just an extra boost.

Still, it is a fun process and it is a way to promote growth. The feeding process is not too hard, but you must follow the instructions below to avoid harming your plant. 

Here is a list of best practices when feeding Venus fly trap. You can view the full instructions with pictures herein this article: Venus Fly Trap feeding Guide.

  • Outdoor Venus flytraps do not require feeding
  • Feed your plant once every 2 to 6 weeks
  • Only feed insects or spiders to your Venus Flytrap
  • The insects must fit inside the trap
  • Do not feed your plant during dormancy
  • Baby Venus flytraps do not need to be fed

Recommended Products for Growing Venus Flytraps

Easy Steps to Remove Venus Fly Trap Flowers

Venus fly traps commonly produce flowers in the spring. A general recommendation is to remove the flowers and stop the blooming process. Today, I will share with you when to remove the flower stalks, how to do this, and some general tips.

When Venus flytrap flower, they produce flower stalks. Those flower stalks look like tubular sprouts that eventually develop flowers at the very end. Producing the branch and, eventually the flowering takes a lot of energy from the plant; for that reason, it is recommended to remove those stalks if you are not planning to collect seeds.

Remove flowers from your Venus fly trap using a sharp and sterilized pair of scissors or small shears. Cut the flower stalk from the base. To minimize energy drainage, remove the flower bud as soon as it sprouts. Wait until the stem grows for at least 3-4 inches to cut if you would like to propagate through stalk propagation.

Because Venus fly trap flower stalks are pretty thin, the only utensils you need are a pair of scissors. I recommend disinfecting the scissors by rubbing some alcohol before you get started.

Removing the flowers from Venus flytraps is not very hard. This video shows the process step by step. Also, keep on reading for more information on how to remove the flowers and how to propagate through stalks.

Remove Venus Flytrap Flowers

Steps to remove Venus fly trap flower buds

  1. Grab a pair of scissors
  2. Disinfect the blades with rubbing alcohol
  3. Do not wait until the plant has flowered to remove. Extract flowers when the stalk is growing.
  4. Separate the stalk from the plant
  5. Cut the stalk off as close to the bulb as possible without causing harm
  6. Plant the stem if you wish to propagate or dispose
  7. Stay alert for more flower stalks; Venus fly traps often attempt flowering multiple times
  8. Remove all subsequent flower stalks

Removing Venus fly traps is easy; however, deciding to remove the flowers all not can be a challenge. This article can help you make the best decision: What to do when your Venus fly trap flowers. It includes a decision diagram to select the best alternatives.

When Should You Remove The Flower from Your Venus Fly Trap

Venus fly traps naturally produce flowers every year during the spring. It is an entirely normal process that does not harm the plant. However, it does take some energy from the plant.

This means that if your plant flowers once or even multiple times, it can continue to live without any issues. But, their growth will become stagnant through the growing season. Compared to a venus flytrap that got its flowers removed, that one will appear to be smaller.

The general rule is to remove flower stalks to stop your plant from blooming to save energy. However, if you are interested in observing the flowers, collecting seeds, or are confident with how well your plant is doing, there is no need to remove them.

For most Venus flytraps blooming is a sign of Maturity. Once Venus flytraps are mature (after 3-4 years), they produce flowers every spring. However, there are some exceptions that I should mention. In some cases, unhealthy Venus flytraps that are dying will make flowers as a last resort to reproduce. In those cases, the flower won’t kill the plant but will expedite the inevitable process. This article has a lot of information on this: What does it mean when your Venus flytrap flowers – Risks.

In this first photo, you can see a healthy Venus fly trap growing a stalk. It is easy to see the plant is happy as it has bright colors and several leaves.

Now, compare the first Venus fly trap with this other one. This one is also flowering, but it is not doing very well. The colors are off, it only has a couple of leaves, and one is dying. In this case, I wouldn’t risk letting the bud develop. Flowering could weaken the plant enough that it might end up dead. Of course, that is not the only problem. Besides removing the flower, the plant needs a healthier environment.

There is one point that many miss about flower stalks. Generally, there is an ongoing debate if you should or shouldn’t remove the stalks—however, not many talk about how to use the stalks for propagation.

Venus Fly Trap Flower Stalk Propagation

It is possible to propagate Venus Flytraps through flower stalk propagation. And this propagation method is straightforward.

The process of propagating Venus flytraps through flower stalk cuttings is uncomplicated. First, cut flower stalks after they grow 2-4 inches. Then, plant the flower stalks in carnivorous plant soil. Plant them vertically or horizontally. Finally, provide water and lighting. Flower stalks exhibit growth within 2-5 months.

I have included a brief explanation below with the general steps. Read the complete article on Venus flytrap flower stalk propagation for an overview.

Suppose you wish to try this propagation method. First, you must know that the probability of success is low. However, the process is so easy that you might as well try it.

1.- To start with, you must have a flowering Venus flytrap.

2.- To increase your chances of success in flower stalk propagation, you must obtain the cuttings before the stalks flower. For best results, obtain the cuttings as soon as the flower stalks reach a length of 2-4 inches.

When the stalk is at that stage, it only costs the plant a fraction of the energy, and the stem is still very young and fresh.

3.- To extract the flower stalk, cut them with a sharp pair of scissors. Cut as close to the base as possible, but avoid harming the bulb or leaf.

4.- After you extract the flower stalk, cut it into smaller pieces. The number of pieces will depend on the length of the branch. The general rule is to divide the flower stalk into segments of at least 2 inches in length. If the stalk is skinny, try only dividing it into a length of a minimum of three inches.

venus flytrap flower stalk

5.- Plant the flower stalks into humid carnivorous plant soil. You can plant the stalk by sticking them vertically to the ground and blurring .5 of an inch. Also, you can place them on the soil horizontally and bury both ends with some soil.

flower stalk propagation

6.- After planting the flower stalks, you are all set. If you provide appropriate care, just the same as a Venus fly trap, you should observe some growth within the next 2-5 months.

Without flowers, you will be unable to collect seeds. But cutting the flower stalks allows you to experiment with another reproduction method: flower stalk propagation. And, as you have learned, the flower stalk propagation process is uncomplicated.

What Does It Mean When Your Venus Flytrap Flowers – Possible Risks

Even though it might not be evident to many, Venus flytraps produce flowers. Venus flytraps have modified leaves that form traps to capture insects. Those traps are not flowers but just modified leaves. In specific environments, venus flytraps bloom and produce flowers; in this article, I will share what it means and my recommendations for recommended next steps.

Venus fly traps flower when they reach maturity after 2-5 years. They flower in the spring producing one or multiple long stems that turn into flower bunches. The flowering process is not bad for the plant, but in some cases, it is recommended to cut off the stalks and prevent the plant from blooming.

Seedlings and young Venus fly traps won’t flower right yet. Once Venus flytraps reach maturity after 2-4 years, the plant will start producing flowers yearly.

Does Blooming Kill Venus Flytraps

The flowering process is entirely natural for Venus fly traps, as it is for all other plants. The production of flowers signals that the plants are mature and ready to propagate.

Even though flowering does not kill Venus flytraps, it does take up substantial amounts of energy from the plant. The flowering process will slow down growth through the growing season.

I have grown Venus fly traps for almost half a decade, and I sometimes skip the flowering process by removing the stalks when they are just 1-2 inches long. Why do I do that? If I am not planning to collect seeds, I do not mind removing the flowers and saving my plants some energy for speedy growth through the summer.

Learn how to pollinate your Venus fly trap flowers and collect seeds by reading this article: How to Propagate Venus Fly Traps

In many cases, like the ones below, it is recommended to skip the flowering process:

  • Venus fly traps sometimes produce a flower when they struggle to survive as a last resort to propagate. Your plant might die as blooming can end up using up all of the plant’s energy.
  • When weather conditions are variable, Venus fly traps produce flowers during the growing season, slowing the growth.
  • You won’t collect seeds, and the flowing process limits the growth

In the next section, I will cover each of these scenarios and how to address them. This article covers an overview, but if you want to go over a complete analysis, read this article: What to do when your Venus flytrap flower.

When to Stop Your Venus Fly Trap from Flowering

Here are three scenarios when it is recommended to stop the flower stalks from developing:

The Venus Flytrap is Producing Flowers Before Dying

When Venus flytraps are growing under unsuitable conditions, they suffer immensely. They shrink in size, lose leaves, fade their colors, etc. You can read this article to assess if a plant is dying: Key signs your Venus flytrap is unhealthy.

Venus flytraps that are slowly dying can sometimes produce flowers. It is overall a negative sign. It usually means the plant is trying to propagate before dying.

You can let your plant flower, but your Venus fly trap will likely die unless you fix the negative environment and get a bit lucky. The best strategy is to remove the flower stalks immediately and improve your plant’s growing condition. Maybe it needs more light or perhaps more water.

Your Venus Fly Trap is Flowering in the Growing Season

Venus fly traps naturally flower in the spring. They go dormant during winter, and they start flowering as they rise with the warmer weather.

Due to the changing temperature, fluctuation in the climate, or just luck, Venus flytraps can flower during the growing season. This is not negative, but just not optimal. Venus flytraps should bloom in the spring for propagation and continue to the growing season all through the summer.

Blooming in the summer will substantially slow down growth. Therefore, the recommendation is to stop flowering when it is out of the cycle. Unless you are highly interested in collecting seeds, flowers during the summer months are not very beneficial.

You Won’t Collect Seeds When Your Venus Flytrap Flowers

Propagating Venus flytraps is an enjoyable and rewarding process. I have done it multiple times with seeds, stalks, and divisions (you can learn about all these methods here). However, you might not always want to propagate my plants and collect seeds.

If you are not planning to collect seeds, it is generally recommended to skip the flowering process. The flowers are not extremely impressive, only last for a short period, and the blooming process impacts the plant’s growth.

Removing the flowers will translate into larger traps and bigger plants.

It is understandable if you are just curious about the flowers and want to see them. You definitely can; it is entirely safe for your plant.

How to Stop Your Venus Fly Trap from Flowering

Now that you have learned the best strategies for deciding to keep or remove the flowers, it is time to cover how to stop your Venus fly trap from flowering.

Prevent your Venus flytrap from flowering by cutting off the flower stalk as soon as you spot them. You can also cut them when they have reached 1-2 inches in height. Use sharp scissors and remove them from the base.

This article shared a video and steps of how to remove the flower without harming the plant: Easy Steps to Remove Venus Fly Trap flowers.

The flower stalks take a few weeks to grow and flower. To ensure you prevent your plant from spending extra energy in the flowering process producing the stalk and then blooming, you must remove the branch as soon as possible. Even if the stalk has not flowered yet, the bigger it is, the more energy your plant is allocating for that process.

There is an exciting method to propagate your plant with those leftover flower stalks! To increase your chances of success in flower stalk propagation, you must obtain the cuttings before the stalks flower. For best results, get the cuttings as soon as the flower stalks reach a length of 2-4 inches.

The process of propagating Venus flytraps through flower stalk cuttings is uncomplicated. First, cut flower stalks after they grow 2-4 inches. Then, plant the flower stalks in carnivorous plant soil. Finally, provide water and lighting. Flower stalks exhibit growth within 2-5 months.

You can get step-by-step instructions and watch a video on flower stalk propagation here.

Venus Fly Trap Lifecycle With Photos + Care Tips

Venus flytraps are native to South Carolina and North Carolina in the United States. They evolve to be carnivorous due to the challenging growing conditions in the area. They grow in soil lacking critical nutrients for most plants’ survival. Without those nutrients in the soil, venus fly traps had to evolve to extract such elements from somewhere else; that is where their trapping mechanism comes in.

In this article, I will share with you the life cycle of a Venus flytrap going through the years: from month one to 10+ years, and through the year’s growing seasons.

Venus fly traps can live for close to 20 years if they have enough access to sunlight, pure water, and cold winters for dormancy. Their life cycle stages are germination, growing season, flowering, propagation, and dormancy. Venus flytraps take 3-4 years to mature and start producing flowers, however they can propagate before maturity.

As Venus fly traps grow, they will reach maturity and also develop larger and taller traps. This chart shares the approximate size a Venus fly trap reaches over time, plus some key considerations for each year:

AgeTrap SizeRecommended
Pot Size
(diameter)
Overview
SeedlingsTinyAny sizeThe seeds will sprout, develop working traps, and grow exponentially fast
1-2 years1/8 inch2”The plant will grow rapidly, they should experience their first dormancy, and grow multiple traps at a time
3-4 years1/4-1/2 inch3″-5″The Venus fly trap will reach maturity and start producing flowers
5-7 years1 – 2 inches6″The plant will reach its adult size, it will bloom multiple times every year in the spring
7+ years1 – 2 inches6″The plant can continue to grow and divide for many years. In the right condition they can live up to 20 years.

Now, let’s go over what to expect year over year:

Year 1: Germination and Seedlings

Venus fly trap seedlings
3 month old Venus fly trap seedlings

The first year of a Venus flytrap is very impressive. They germinate from these tiny black seeds that look like pods. Germinating Venus fly trap seeds is not extremely difficult, they need to be placed on top of carnivorous plant soil with plenty of water, humidity, and indirect lighting to germinate. You get the whole process here: Venus flytrap propagation guide.

Venus fly traps take 4-6 weeks to germinate depending on the seeds. Once, they sprout you will see some tiny green leaves. The seedlings will continue to need the humidity, water and lighting and they will start becoming stronger in the next couple of months.

Seedlings have the exact shape as adult Venus flytraps, but just very tiny. The growth accomplished in the first year is dependant on the environment. Plenty of sunlight ensure the plant will develop bright colors and grow in size significantly.

Do not worry about feeding your Venus fly trap the first year. Their traps work, so they might catch a gnat or other tiny insect, but feeding them is not necessary.

One of the most critical needs for Venus flytraps is dormancy. Venus fly traps must go dormant every winter to stay healthy. Without dormancy, venus fly traps can live for 1-2 years, but not longer than that. For that reason, I recommend learning about dormancy early on and ensuring your plants go dormant every winter.

Young Venus fly trap

Year 2: Continuous Growth

Between year 1 and year 2 Venus flytrap undergo substantial growth. By the end of year two, they will develop traps that expand to 1/4 of an inch or even half and inch. Besides the trap side you will notice that the leaves in general become bigger, now the plant takes up a lot more vertical and horizontal space. At this point, the plant has most likely not reached maturity, so it won’t produce flowers. Still, the plant might be able to divide and produce clones of it self by rhizome divisions.

Make sure your Venus flytrap goes dormant every year to keep it healthy and also to ensure it continuous growing at a good rate. You can technically skip a dormancy period without killing your plant as long as you don’t skip multiple in a row. However, skipping dormancy, will delay your plants growth.

Mature Venus flytraps

Year 3 -4: Maturity

At this point, venus flytrap have not reached their maximum size, but they will reach maturity.

Venus fly traps blossom when they reach maturity. They produce tubular stems that grow into flower blossoms for propagation through seeds. Then can produce multiple flower stems every yea, usually in the spring.

When a Venus fly trap flowers, it is a sign that is has reached maturity. There is no negative effect in plants, however, some people recommend removing the flower stalks before they flower to save the plant energy. Producing flowers won’t harm the plant, but will burn some energy that could be used for growing bigger leaves.

WHen Venus fly traps blooms, it is possible to pollinate the flowers and collect seeds for propagation. Each flower stalk usually carried multiple flowers that can produce dozens of seeds each.

You can learn more about the flowering process and what to do with this article.

Fully grown Venus flytraps

There is a unique way to propagate Venus flytraps through flower stalks (learn how it works!).

Year 5-7: Reaching Maximum Size and Continuous Propagation

After reaching maturity, Venus fly traps will continue to grow. Depending on the cultivar, Venus fly traps can develop traps as big oas 1.5 – 2 inches. Usually between year 5-7 is when they reach they maximum size,

The venus fly trap might continue to grow after that, but they growth will be marginal in terms of trap size. Still, they can continue growing in surface area.

At this growth stage Venus fly traps will produce multiple flowers every year and will propagate through divisions. When Venus fly traps are growing in a suitable environment they divide to produce clones of themself. Most plant grow a maximum of 6-8 traps per plant. Adult Venus flytrap can have dozens of traps, which means that they have divided, and now you have multiple clones of the parent plant growing together.

Venus Flytrap Life Cycle Stages Overview and Care

Germination: Venus flytraps produce seeds when their flowers are pollinated. The seeds from a Venus flytrap are tiny, shiny, and black. Also, their seeds do not need stratification. When growing Venus flytraps from seeds, attempt to germinate them as close to harvest as possible. When the seeds get older, the probability of producing seedlings lowers significantly. it is recommended that you sow seeds in the spring or early summer.

From sowing the seeds it can take up to 6 to 8 weeks to see any sprouts. fresh seeds tend to sprout the fastest.

Growing Season: Venus flytraps enter the growing season in the spring and finish it when they go dormant. During this season, Venus flytraps grow at full speed, increasing the traps’ size and sometimes dividing into multiple plants (vegetative propagation).

On average, 3-4 years is the amount of time it takes to grow Venus flytraps from seeds until maturity. Mature plants start producing flowers and can continue growing in size if given proper care.

Dormancy: In their natural habitat, Venus flytraps are exposed to cold temperatures (below 50 F) for several months in a row. During the winter months, Venus flytraps go dormant. The dormancy process is similar to hibernation. The plant goes into a resting mode for several months. During dormancy, Venus flytraps stop growing, they lose their leaves and kind of look down for several months.

Venus flytraps enter dormancy when they are exposed to temperatures below 45F for 2-4 weeks. Venus flytraps experience a full dormancy after 3 to 5 months in cold climates. The plants will exit dormancy as the temperature sizes, they will reflourish and start growing at a very fast pace.

Flowering: A few weeks after exiting dormancy, mature Venus flytraps will produce flower stalks in early spring. They might produce multiple stalks with dozens of flowers.

Since Venus flytraps spend a lot of energy producing flowers, many recommend stopping the flowering process by cutting the flower stalks before they develop. I personally do it sometimes, when I am not interested in the seeds.

Removing the flower stalks early on will save the Venus flytrap a lot of energy it can employ to grow and develop. However, if you leave the flower stalks, you can potentially pollinate the flowers and collect seeds.

Venus Fly trap Care Tips

Healthy Venus fly traps can live for many many years. This list of care tips will help you ensure your plant remains healthy:

  • Light: Optimally they should receive 12 hours of sunlight, and the minimum is 6 hours of light. The light source might be natural light or artificial lighting (plant lights)
  • Water: Venus flytraps must be watered with pure water only, such as rainwater, distilled water, and reverse osmosis water. Tap water and bottled water kill carnivorous plants. The soil of the plant must always remain moist. Always keep the ground humid, but do not flood. Venus flytraps do not grow in swamps.
  • Soil: Employ nutrient-free soil for carnivorous plants. Never employ enriched soil, full of fertilizers. This article covers many soil options for Venus flytraps.
  • Feeding: Venus flytraps do not need to capture insects to survive, but they benefit from them greatly. Place Venus flytraps outdoors, and they will have plenty of access to food. Also, consider feeding your plant to provide extra nutrients.
  • Fertilizers: Do not fertilize Venus flytraps. The chemicals in the fertilizers can hurt the plant
  • Flowers: After reaching maturity, Venus flytraps start producing flowers every spring. Skipping it allows for further growth and development.
  • Dormancy: Venus flytraps must undergo a dormancy period for 2-3 months during the winter. Venus flytraps must go dormant every winter to remain healthy and live for many years. Ensure your plant will experience this resting period by placing them in a cold location. For example, outdoors, in a cold garage, or porch.

Are you thinking about growing your Venus flytraps indoors? This guide: Venus Flytrap Indoor Care explains the requirements for lighting, watering, dormancy, and much more…

How to Grow Venus Fly traps with Artificial Lights– Best lights

Venus fly traps need a lot of light to grow. Sunlight is the best light source for fly traps; however, not all can provide long hours of daily sunlight to this unique plant. I have grown Venus flytraps indoors successfully with artificial lights, and I will teach you how you can do the same.

When employing artificial lights for Venus fly traps, choose LED or fluorescent bulbs of at least 1500 lumens. The preferred temperature is 6500K. Place the artificial lights 10-12 inches from the Venus fly traps and run the lights for 10-16 hours a day.

Growing Venus Fly Traps Indoors vs. Outdoor?

Because Venus fly traps need a lot of lighting to grow and be healthy, sunlight is the best light source. If you have the possibility of growing your fly trap outdoors and providing at least 4-6 hours of direct sunlight, choose the outdoor option. If you can’t provide a sunny outdoor location for your plant, then choose indoor growing with artificial lights or a combination of natural and artificial lighting.

For a complete overview of lighting for Venus flytraps, read my full guide in this article.

The Best Artificial Lights for Venus Flytraps

Venus fly traps require powerful lighting. You will need to look for bulbs or light fixtures that provide at least 1500 lumens. Then, you will need to keep those lights on for 10-16 hours a day. This table summarizes the spec to look for suitable lights for Venus flytraps. Also, you can check out my recommendations below.

Technology TypeLED or fluorescent lights
Color6500K (cool white)
Lumens>1400 lumens
Daily Timer12h or more would be optimal. Some lights come with built-in timers
Recommended specifications for carnivorous Plant Lights

Personally, I have used these different types of lighting successfully. Each of them adapts to different setups:

Cheapest Artificial Lights for Venus Flytraps

The cheapest lights for Venus flytraps are T8 fluorescent lights or single Compact Fluorescent Light (CFL) bulbs. I recommend the T8 tubes for multiple plants and the single bulbs for single plants. Here is a direct link for the compact light bulbs: CFL, 6500K, 2100 lumens.

The unit price for this option is about $10-13, but keep in mind that you will need a lamp or a socket to mount it too.

Practical Artificial Light Fixture for 2-3 Venus Fly Traps

When I first started growing Venus flytraps, I only had three in a single pot. These lights have helped me provide appropriate lighting for them for over a year. Eventually, I switched to a larger lighting setup, but this light is perfect if you are just getting started or just have a few plants.

The light comes with time to set up the lighting cycle. I recommend choosing the 12-hour cycle. Place your plants 5-10 inches away from the light to maximize exposure, and make sure all the bulbs are pointing directly at your plants.

The Best Artificial Lights for Multiple Venus Flytraps

Venus Fly traps under LEDs

Once your collection of Venus flytraps or carnivorous plants grows, you will need a powerful and large setup with lights. Here is a link to the LED lights I use so you can check the price and reviews.

These LED light fixtures are some of my favorites for a few reasons:

– They provide enough lumens for Venus flytraps when placed directly over the plant (5-10 inches away)

– They do not get hot and can be placed close to plants without burning

– They are energy efficient

To install these LED tube lights, I suggest using a plant shelf. It is a solid way to get organized, and you can connect multiple lights to each other to provide even more lighting to your Venus fly trap.

You will also need a timer to manage to turn the power on and off for these fixtures. You can get a smart outlet like this one and run the lights daily for 12 to 16 hours.

LED vs. Fluorescent Lights for Venus Fly traps

LEDs and fluorescent lights are both suitable for Venus flytraps and most carnivorous plants. However, there are some benefits why I prefer LEDs over fluorescent alternatives.

LEDs are much more energy efficient than fluorescent lights. When you have a lot of lights, all running for over 12 hours a day. Efficiency is critical.

It is critical that you keep the light source close to your plants. LEDs do not overheat, so you can place them very close to your plant without risking burning them.

Still, fluorescent lights are a viable option. Do not be afraid to use them if you have some in hand. Also, they are cheaper alternatives to start with, even though the energy bill will be higher.

How To Build An Indoor Setup for Your Venus Flytrap

Follow this section step by step to set artificial lights and your Venus flytraps in the appropriate environment.

1- Find the right place for your Venus flytrap.

Find a spot where your Venus fly trap can grow without stress. Consider that pets are usually curious about Venus fly traps and might like playing with them. I recommend a place that keeps the plants away from pets, and that has access to natural light.

Even if you know you will need artificial lights, look for a place where your plant has access to some sunlight to supplement its growth.

2- Select the artificial lights for your Venus flytrap

Use LED or fluorescent lights that provide at least 1500 lumens at 6500K.

3- Mount the artificial lights directly over your Venus fly trap

Mount the lights 5-10 inches away from your plant. Depending on the lumens your plant receives, you might be able to either move the lights farther away or bring them closer together.

4- Set up the light timer

Since artificial lights are not as powerful as sunlight, you must have them on for extended periods of time. Set the timer to turn on your lights for at least 12 hours. In my current setup, I run them for 14 hours.

5- Adjust the lighting distance

As your plants adapt to the new lighting, you should monitor them to determine if they are happy with the lighting or if they might require more. Usually, plants take 2-4 weeks to show signs the light might not be enough.

This next chapter outlines some clear signs your Venus fly traps need light.

8 Signs Your Venus Fly Trap Doesn’t Receive Enough Light

When Venus fly traps do not receive enough light, they suffer greatly and start exhibiting signs. Here are some to keep an eye on:

  • Your Venus flytrap is losing its colors
  • The petioles are growing wide
  • Venus fly traps are not producing traps
  • The plant is droopy and wilting
  • The traps have lost all red coloring
  • The traps stop working; they won’t close
  • The plant is losing leaves and reducing in size

This article covers each of these signs and outlines how to fix these problems: 7 signs your Venus flytrap needs more light.

 Venus Fly Trap Indoor Care Tips

Growing Venus flytraps indoors can be quite challenging, there are several considerations to be aware of when growing Venus fly traps inside your home:

Lighting: Provide at least 12 hours of artificial lighting and, if possible, supplement with direct or indirect sunlight from a window sill or a glass door

Watering: Water Venus fly traps often to keep the soil always humid but not flooded. When growing indoors, avoid overwatering and leaving the soil soggy for extended periods of time. Overwatering can cause root rot and mold issues.

Feeding: IndoorsVenus flytraps will have little to no access to bugs. Employ a single insect to feed your Venus flytrap once every 1-2 months to encourage growth.

Dormancy: Venus flytraps need a period of inactivity called dormancy every single year. In order to go dormant, they need to experience cold temperatures for 3-4 months. The temperatures must be lower than 45F. When growing Venus flytraps indoors in a heated location, consider moving your Venus fly traps outdoors or to an unheated location so they can experience winter and dormancy. Dormancy is critical to keep your plant alive in the long term.

Terrariums: Avoid growing Venus fly traps in terrariums. Closed terrariums do not provide enough air circulation and can cause many issues.

Access my complete guide on Venus fly trap care here.

7 Signs Your Venus Fly Trap Needs More Light

Lighting is extremely important for Venus fly traps. Lack of proper sunlight or artificial light will have negative effects on your plant. In this article, I will cover some clear signs your Venus fly trap needs more light.

Venus fly traps need at least 4-6 hours of direct sunlight to survive. 12 hours of direct sunlight is optimal for Venus fly traps. When Venus fly traps are light starved, they often lose their colors and might even become deformed.

It is possible to grow Venus fly traps indoors without sunlight by using strong LED or fluorescent lights of at least 1500 lumens that run for 12- 16 hour daily cycles. This small LED plant light has worked for my Venus fly traps.

Healthy Venus fly traps have deep bright colors and big traps

Even though many factors influence your plant’s health, improper lighting is one of the most common mistakes. Here are the signs your Venus Fly trap needs more lighting with tips to resolve.

The Venus fly trap is losing its colors

Most Venus fly traps characterize by bright green and deep red colors. Some cultivars will have lighter color schemes, but not the vast majority. If your plant is suddenly losing its colors and looking faded, it might be due to not enough lighting.

The Venus fly trap petioles are growing wide

Venus fly traps have long petioles that connect the root bulb with the trap of the plant. Sometimes the petioles start to grow wider and wider to increase their area. Wide petioles are usually a sign of poor lighting.

The plant is trying to grow wider leaves to have higher exposure to sunlight. The wider petioles won’t affect the plant immediately, but they are a sign that your plant is unhealthy. As soon as you introduce extra lighting, your plant should start growing more proportional petioles.

Venus fly traps are not producing traps

Under very poor growing conditions and lack of lighting, Venus fly traps will stop producing traps altogether.

The plant is suffering greatly and aims to focus on photosynthesis. It won’t produce any traps because capturing bugs is not a priority.

If your plant is not growing any traps, you must correct the environment. Place it under bright sunlight for a few hours a day and slowly introduce more lighting until you reach 10-12 hours. Your plant should start producing leaves as soon as it starts recovering.

The Venus flytrap is looking droopy and wilting

Venus fly traps droop for three main reasons: not enough water, lighting, or both! Assess the water and lighting when your plant is looking down.

Venus fly traps need to be watered often. The soil must remain humid at all times. Completely dry soil can harm Venus fly traps (you can find more information on watering here!)

Lack of lighting will also make your Venus fly trap wilt, but reintroducing it to light will bring your plant back to normal again.

Venus fly traps growing in Walmart or Home Depot are often droopy because they grow on dark shelves and are never watered.

Once your plant is at home, it can sometimes also look droopy. This guide can help you find out what is wrong..

Once your plant is at home, it can sometimes also look droopy. This guide can help you find out what is wrong..

The traps have lost all red coloring

Varieties of Venus fly trap have different shares of color inside the traps. Some have very deep burgundy shades, and others are all green.

When Venus fly traps have red coloring inside their traps, and they suddenly start losing it, it can be a sign of poor lighting. The red color inside the traps is designed to attract insects. When a Venus fly trap requires more light, it will stop worrying about capturing prey; therefore, it can stop producing traps with red shades.

The traps of the Venus fly trap stop working

Non-working traps are not always a sign of poor lighting, but they can certainly be. Venus flytraps often develop traps that do not close when triggered when they are dormant, have had a lot of stress, or are not receiving enough light.

Venus fly traps go dormant in the winter when exposed to weather below 45 F. While dormant, most traps might not work.

Shipping, repotting, or abrupt temperature changes can cause stress in your Venus flytrap that can consequentially make the traps stop working.

If you believe the traps in your plant are not working due to improper lighting, watch for additional signs to confirm before making abrupt changes in your plant’s environment.

The plant is losing leaves and reducing in size

When growing conditions are not optimal, Venus fly traps will stop dividing and stop producing as many leaves. In some cases, you might notice an abrupt reduction from having 6-8 healthy leaves to only a couple.

The small number of leaves is not always a sign of improper lighting but a sign of poor growing conditions. Assess the overall setup and check for the lighting and watering requirements with special attention.

Now that you have learned about the signs your Venus fly trap needs more light, it is time to fix the setup and provide appropriate lighting.

The recovery time will vary in length depending on the severity of the light starvation. Some plants can recover in just a few days, while others might take 4-5 weeks. A slight fade in color it’s a pretty mild sign. When a plant stops growing traps altogether, it’s a pretty serious sign.

First, start by learning more about the light requirements for Venus fly traps in this article: Venus Fly trap lighting requirements explained

Then, introduce your plant to more lighting slowly. Add one to two hours every couple of days if your plant is growing outside.

For indoor plants, consider placing the light source closer to your plant. LEDs can be mounted a few inches away from your plant without burning the leaves. I recommend bringing the lights closer by a couple of inches every few days until you reach the desired light exposure.

It is also possible that your artificial lights are not suitable for Venus fly traps. In this article, I share my recommendations for Venus fly trap plant lights and a guide to check the specs.

After you have increased the lighting, your Venus fly trap should start looking bright and happy again. For more care information, read this complete guide on growing Venus flytraps.

Venus Flytrap Light Requirements Explained- Outdoor & Indoor

Giving Venus flytraps enough lighting is critical to keep them alive and healthy. They are exposed to many hours of direct sunlight in their natural habitat, often over 12 hours in the growing season. When growing Venus flytraps at home, you must try replicating the high lighting conditions.

As a general rule providing over 12 hours of direct sunlight is optimal for Venus flytraps. The minimum recommended amount is 4-6 hours of direct sunlight. Venus flytraps can be grown indoors or outdoors as long as they receive enough light.

Growing Venus flytraps indoors is possible but a lot more challenging due to the need for artificial lighting. If you live in a sunny area, growing your Venus flytrap outdoors is your best bet!

I have grown venus flytraps outdoors and indoors for over five years and I can assure you: mastering the lighting setup is critical to growing carnivorous plants. In this article, I will share with you exactly how much light to give your Venus flytraps whether it is inside your home, on a windowsill, or outdoors 🙂

Venus Flytrap Outdoor Sunlight Requirements

Growing Venus flytraps outdoors is very beneficial for many reasons: airflow, plenty of bugs, seasonal temperature changes, and most importantly: natural lights! Sunlight is the best type of lighting you can provide to your plants.

For best results, grow Venus Flytraps under direct sunlight. Over 10 hours of daily sunlight are optimal for Venus flytraps. The minimum recommended daily hours of sunlight is 4 to 6 hours of direct sunlight.

Periods of partial shade throughout the day are acceptable as long as your plant has access to enough direct sunlight.

The more hours of sunlight, the better. There is really no limit to the lighting you should provide. When Venus flytraps grow under strong direct sunlight they grow rapidly, develop beautiful colors, and often divide and replicate, creating more and more traps.

Acclimation:

Before introducing a new plant to direct sunlight or increasing the amount of lighting, make sure to go through an inclination period. Slowly introduce your plant to more lighting by transitioning from partial shade to direct sunlight. Add 1-2 hours of direct sunlight per week until you get to complete direct sunlight.

Introducing new plants to direct sunlight right away can burn them or take them into shock. Venus flytraps love direct sunlight, but abrupt changes can harm them.

Temperature Considerations:

Venus flytraps have no issues withstanding hot temperatures as long as the soil is properly watered (you can find more information on watering here!) However, once the temperatures rise over 100F, your plant could be at risk of drying out or burning. A way to prevent harmful heat exposure is to use pots made of good insulation materials (plastic, styrofoam), use4 a shade cloth when temperatures rise above 110F, and keep your plants in a tray with water.

Venus Flytrap Indoor Lighting Requirements- Artificial Lighting Setup

Venus flytrap can grow indoors; however, providing enough indoor lighting can be challenging and expensive. In this section, I share my method and setup elements to grow venus flytraps indoors successfully and under a friendly budget.

First of all, if you have the chance to grow your Venus flytrap outdoors. Please do it. It is a lot easier 🙂

But if you don’t have that option… this is the way to do it:

When growing Venus flytraps indoors, first try to find a spot in your home that might have some access to natural light. Sunlight is very strong, and it’s free, so any would be very helpful to grow your Venus flytrap.

Artificial Lighting Venus Flytrap

As a general rule, Venus flytraps can remain healthy if exposed to more than 6 hours of artificial lighting. For optimal results, provide over 10 hours of artificial lights with LEDs or fluorescent bulbs of at least 1500 lumens.

Since artificial lighting can be a lot less effective than sunlight, you should aim to provide light for very long periods. You can run your lights for 16 hours; Venus flytraps will benefit from the extended exposure. I have used this small LED plant light to grow some of my Venus flytraps, and they are doing great. For multiple plants, you can employ these light fixtures: T8 LED light strips (6500k Cool White): https://amzn.to/3uWoeh2. Here is a picture of some of my Venus flytraps growing under these lights:

Venus flytraps growing under artificial lights

When growing Venus flytraps inside your home, consider buying T8 high-output fluorescent or LED lights of cool colors. The optimal temperature is 6500K.

The benefit of using LEDs for Venus flytraps is that they remain cold and are not a heat hazard. Also, they are more energy efficient than fluorescent lights. So, you can place them very close to your plant. I place them 10-15 inches away from the light source but feel free to experiment with the distance. Overall, you want your plant to be close to the light.

In this article, I explain in detail how to select artificial lights for your plants. Check it out for recommendations. It includes options for advance growers and for newbies, and also varied budget options that fit all.

There are also some scenarios where Venus flytraps can grow with a combination of sunlight and artificial lighting, like growing them on window sills or a sunny porch. If you believe your Venus flytrap is not getting enough light, you can always add artificial lighting to supplement.

In this video, I explain the basics of how to grow venus flytraps indoors and the lighting considerations plus growing tips 😉

remember that besides the lighting, there are other considerations you must address when growing Venus flytraps indoors: moisture, temperature, dormancy, etc…

Venus Flytrap Lighting in Windowsill

Windowsills can be great places to grow venus flytraps as long as they are bright enough. As a general rule south-facing windows get the most sun, however, the lighting can vary depending on your specific home so don’t follow that rule blindly.

Assess the windowsills in your home and choose one that provides at least 4 hours of direct sunlight. The more direct sunlight the better, but 4 hours is the bare minimum. Also, indirect sunlight also helps, but it should just be a supplement not the only source of lighting. For best results use a windowsill that opens so your plant can have access to bugs and continuous airflow.

Make sure to check for the temperature in the windowsill area. The glass in windows can sometimes act as a magnifying glass and heat up the area. Extreme heat can burn your plant, so make sure you check that first!

If none of your windowsills can provide enough light, consider using a combination of artificial and natural light. This small LED plant light I shared before had a clip that can easily attach to windowsills. I would suggest to provide at least 6 hours of artificial light as a supplement to sunlight.

5 Signs Your Venus Flytraps Needs More Light

These are some clear signs your Venus flytrap is not receiving enough light and might be dying:

Droopy Venus Flytrap: Your Venus flytrap is looping droopy and down. Not enough water or lighting can make your plant wilt and look like is dying.

Decoloration: Lack of bright colors. venus flytraps are known for their bright burgundy and green colors. Lack of proper lighting can make your Venus flytrap lose its colors and suddenly look faded

Non working traps: Without proper lighting Venus flytraps deprioritize catching bugs, so their traps might not work at all.

Wide petioles: When Venus flytraps are light starved they start growing their leaves. Specifically the petiole area (all but the trap). the petiole turns wide to maximize light exposure

Tiny traps or lack of traps: Venus flytraps will actually reduce the size of the traps or stop producing traps if the lighting is not enough.

This article covers each of these signs and outlines how to fix these problems: 7 signs your Venus flytrap needs more light.

The Best Soil Options for Sundews (Plus Planting Tips)

Selecting appropriate and safe soil for Sundews can be a challenge when you are just getting started. Sundews have specific requirements for potting media that can affect their health. In this guide, I will list all the information needed to get the best soil for your Drosera.

Sundews require soil that has no nutrients, preserves moisture, and proper drainage. Sphagnum moss, peat moss, perlite, and silica sand are common ingredients for carnivorous potting media for Drosera.

When I first started growing carnivorous plants, I did not know about their soil consideration. Most plants grow in almost any soil, but Sundews are special, standard potting mixes won’t do.

After research and personal experience caring for my plants, I have learned how to grow Sundews, Pitcher plants, and Venus flytraps.

In this guide, I will help you select the suitable soil for your Sundew and decide whether to make it yourself or buy it online. I have included some links to online shops to make it easy for you.

Young Sundews Growing In Carnivorous Plant Soil

Suitable Potting Media for Sundews

Sundews are very unique plants and like most carnivorous plants, they have very specific requirements.

Drosera are extremely sensitive to the minerals you find in most soil and water. Nutrients present in the soil can kill Sundews.

Sundew plants thrive when planted in low-nutrient environments.

Carnivorous plant soil is suitable for growing Sundews. The soil is commonly made up of a combination of pure peat moss, long fiber sphagnum moss, silica sand, or perlite. The soil must not contain nutrients and requires proper drainage.

Carnivorous plant soil for Drosera is commonly made up of these ingredients:

  • Long-fibered sphagnum moss
  • Peat moss
  • Silica sand
  • Perlite

All of these elements must be completely pure and without any additives. Most gardening stores sell Miracle Gro peat moss which is loaded with fertilizers and will kill your Drosera.

You can buy online carnivorous plant soil which is completely safe for Drosera. I have used a couple of different soil mixes over the years with my sundews, venus flytrap, and pitcher plants. Here are the links to some I have used in the past and worked great.

The hyperlinks are affiliate links that will take you to Amazon.com. You can check the prices there, but most soil bags cost less than $20.

It is also possible to make Sundew soil at home by following some general recipes I have listed below. Making the soil is easy and very inexpensive.

My Drosera Natalensis Growing in Carnivorous Plant Soil (a combination of peat moss and perlite)

Sundew Soil Recipes with Ingredient List

If you end up buying premade carnivorous plant soil mixes, that guarantees the soil is completely safe for your Drosera. Making your own soil is a great option too but you must ensure to be extra careful choosing the ingredients as mistakes can ruin your soil mixture.

Each element you use to make the sundew soil must be completely pure; it can’t contain any nutrients or fertilizers. Any typoes of additives will ruin the mixture and harm your plant.

When you buy the ingredients always ask: does it have fertilizers? any additives? The answer should be resounding “no”.

The pictures below are some examples of nutrient-free perlite and peat moss:

These are some excellent examples of Sundew potting media recipes:

  • 3:1 Long-fibered sphagnum moss and silica sand
  • 3:1 Long-fibered sphagnum moss and perlite
  • 2:1 or 3:1 Peat moss and perlite
  • 2:1:1 Peat moss, sand, and perlite

Less optimal options:

  • 100% long-fibered sphagnum moss
  • 100% peat moss

You can plant Drosera in pure moss, but it is not optimal. Pure moss contains no additives and retains moisture, which is suitable for these plants. However, pure moss does not offer enough drainage. Many experienced growers can pot Sundews in pure moss with success, but this is not always the case when you are getting started.

Make Sundew soil by combining one type of moss with sand or perlite. For example, you can employ a 3:1 ratio of peat moss and perlite. Or a 3:1 ratio of long-fibered sphagnum moss with sand. The ratio do not have to be exact, but including sand or perlite is very beneficial.

Making 3:1 Perlite and Peat Moss Soil for Sundews and Carnivorous Plants

For best results, avoid employing pure peat or sphagnum moss. Instead, add some perlite or silica sand to help break up the soil, prevent compression, and promote growth.

Perlite or sand in the soil can make a big difference when growing carnivorous plants. They prevent root rot, provide aeration, and preserve the ground for more seasons.

The recipes on the list are some ideas for soil mixes I have used. The main priority is to get the right ingredients. The ratios I described are not as critical. If you do use silica sand or perlite, make sure a combination of such accounts for at least 20% of the mixture. That way you will be able to observe all the positive effects.

Sundew Planting Instructions: Potting and Repotting

Sundews do not need to be repotted every season or every year. These plants can live happily and thrive in the same container for a few years.

Repotting Sundews into fresh soil every 2 years helps promote growth and prevent rotting. The ultimate season to transplant drosera is in early spring or during dormancy.

Materials to Pot a Sundew

Make sure you have the correct soil, water, tray, and pot before you get started.

Soil: Employ carnivorous plant soil. You can buy it or make it with the instructions from this article.

Water: Use pure water with no nutrients or additives. Distilled water, reverse osmosis water, and rainwater are safe alternatives. I buy distilled water at the grocery store for about $1 a gallon.

Pot: As a general rule select glazed ceramic, plastic, and resin pots for Sundews. Smaller Sundews grow well on 3-4 inch containers while larger plants prefer 5- 10 inch pots. The pots must contain enough drainage holes. For more information on choosing a container, check out this guide: How to Select Pots for Sundews.

Tray: Get a plastic tray to use for watering. The height of the tray should be at least 1/3 of the size of the pot.

You can read through the steps below or watch my YouTube video to see how I plant some brand new Sundews I bought last year: https://youtu.be/HKmKra-c-Kk

Sundew Planting Instructions

  1. Gather the carnivorous plant soil, a pot, a tray, and pure water.
  2. Use a large container to mix the soil and moisten it with pure water. Make sure is completely humid throughout and set aside.
  3. If your plant is in old soil, use your hands to loosen up the media on the edges of the pot.
  4. Turn the pot upside down while holding the top of the pot with your hand (preventing the plant from falling to the ground)
  5. Gently, pull the plant and the soil out of the container.
  6. Use more water to remove as much of the potting media as possible. For best results, use a spray bottle.
  7. Trim any dead foliage. Bare root plants are easy to trim.
  8. If you employ peat moss, place the humid moss in the pot, make a hole in the soil and insert the plant. If you use sphagnum moss, grab a chunk of moss and surround the roots with it, then insert it all into the pot.
  9. Push the soil down gently with your fingers to check for any air gaps. Add more soil if needed. The ground must be set in place but should not be compacted.
  10. Water the pot from the top to set the soil.
  11. Pay extra attention to your plant in the next 1-3 weeks. Most plants will be down for a few weeks after planting. Make sure to avoid stress.
  12. Bonus: Use an air duster to remove any dirt that gets stuck in your Sundew. Use it carefully to avoid removing too much dew.

Sundew Growing Guide

Follow these care instructions to build a proper setup and keep your Sundew plant alive and happy 🙂

Soil: Employ nutrient-free and fertilizer-free potting media. Combining a mixture of peat moss or sphagnum moss with peat or silica sand is an excellent option. Do not use Miracle-Gro.

Lighting: Sundew plants need lots of light. Employ artificial or natural light and provide a minimum amount of 6 hours of light. Optimally, provide 8-12 hours of light.

Temperature needs: Temperarure requirements vary across different varieties of Sundews. Some Drosera undergo dormancy and need a change in climate during the summer or winter months.

Watering needs: Keep the soil humid at all times. Water often or employ the water tray method to keep the soil moist.

Feeding: Feeding is not required and outdoor plants capture their own food. When feeding, employ bugs and only feed once or twice a month.

Trimming: Trim dead leaves when necessary. Please do not cut off leaves until they have entirely dead.

Humidity needs: Keep humidity levels above 40% and 70%. A humidifier is a practical solution for dry indoor locations.

Use of Fertilizers: Avoid fertilizing to prevent damage.

Outdoor vs. Indoor growth: Assess if your indoor or outdoor environment is the most suitable for your Drosera plant. A good strategy is to research about their natural habitat and try to replicate the environment.

For more information, you can read my additional guides and articles on Sundews.

The Best Pots for Sundews Plus Potting Guide

Choosing the appropriate container to grow Sundews also called Drosera is a critical part to keep them healthy. In this article, I will help you select the best pots for Sundews and give you some recommendations.

As a general rule select glazed ceramic, plastic, and resin pots for Sundews. Smaller Sundews grow well on 3-4 inch containers while larger plants prefer 5- 10 inch pots. The pots must contain enough drainage holes to avoid root rot and molding.

The size, material, and color of the pot can affect the health of your plant. Here you can find the recommended specification for choosing growing containers.

Suitable materialsGlazed ceramic, plastic, resin, styrofoam
Unsuitable materialsConcrete, unglazed ceramic, clay, terra cotta, metal
Diameter3-4 inches for small rosette sundews, 5-10 inches for large sundews with leaves that grow out (like drosera binata)
DrainageMust contain drainage holes
ColorAvoid black pots in extremely hot locations
Sundew Pots Considerations

The Best Containers and Pots for Sundews

I have used several pots and containers that work well for carnivorous plants.

You can select any pot that meets the specifications from the table above. But, if you are looking to buy something that works right away, I recommend this pot if you are looking: https://amzn.to/3IYVGKU. Also, the pots are square which makes arranging multiple ones together very easy 🙂

The link will take you to Amazon.com, where you can check the price. They have proper drainage, and the plastic is safe for your plants. There are more expensive pots that could work too, but I tend to gravitate toward nursery plastic because of the affordability and endurance.

These are the key considerations when selecting a pot for your Sundew:

Pot Material: 

When selecting a container, first inspect the material. Terra cotta, metal, clay, and concrete pots leach minerals into the soil, and those minerals are harmful to Sundews. It is difficult to estimate how much minerals will materials leach so I recommend staying away from those materials. Those minerals are usually harmless to most plants, but they are toxic for Pitcher Plants.

For best results, employ materials like plastic, resin, or glazed ceramic. Those materials are completely safe for Sundews.

Glass pots are acceptable container materials. They do not leak any type of element into the soil, but insulation can be a challenge. Make sure to avoid extreme temperatures if using metal or glass pots.

Drainage: 

Avoid using containers with no drainage. It will be extremely difficult to water Sundews properly without drainage.

Container Size: 

The size of the pot you use depends on the size of your plants. However, do not worry too much about the sizing as it is not extremely critical. 3-4 inches work well for small sundews like Natalensis and Venusta, 5-10 inch pots are suitable for forked drosera.

You can grow multiple sundews in the same container. Sundews are easy to care for and as long as you give them a couple of inches of spacing between each other they won’t be competing for space. Planting them in a single large container definitely makes a pretty sight full of colors 🙂

Color: 

The color of the pot can influence the insulation of your plant. Avoid dark color pots if you keep your plants outdoors under direct sunlight. White pots work best in very hot climates.

Airflow:

Closed containers, such as domes or terrariums, are not recommended for carnivorous plants. Without appropriate airflow mold and algae can start to grow throughout.

Sundew: How to Pot and Repot

Sundews do not need to be repotted very often. These plants can live happily in the same container for a few years.

Repotting Sundews into fresh soil every 2 years helps promote growth and prevent rotting. The ultimate season to repot drosera is in early spring or during dormancy.

Make sure you have the correct soil, water, and pot before you get started by going over the requirements below. Then, watch this video for a step-by-step guide 😉 in the video you can see how I plant some brand new Sundews I bought last year.

Employ Suitable Soil

Sundews require specific soil to be healthy. Drosera can’t grow in standard compost or potting soil like MiracleGro due to the richness in nutrients. Instead, you must employ a mixture of these nutritionless elements:

  • Long fibered sphagnum moss
  • Peat moss
  • Silica sand
  • Perlite

Make Sundew soil by combining one type of moss with sand or perlite. For example, you can employ a 3:1 ratio of peat moss and perlite. Or a 3:1 ratio of long-fibered sphagnum moss with sand. The ratio do not have to be exact, but including sand or perlite is very beneficial.

Sand or perlite in the potting medium provides better drainage and aeration, which ultimately promotes growth.

You can buy the ingredients listed above and make carnivorous plant soil or buy it online.

Here is the amazon link of the carnivorous plant soil I use for my carnivorous plants. It is affordable, safe, and very effective: https://amzn.to/3uVbg39. I sometimes make my own soil when I am repotting many plants, but buying it is always a practical option.

Water Type and Watering Instructions

Avoid at all costs using tap water and most bottled water to water Drosera. Such water contains too many minerals and nutrients and is not safe for your plant. These plants require low mineral water. To keep your plants healthy, only employ pure water, such as:

  • Rainwater
  • Distilled water
  • Reverse osmosis water

To water Sundew appropriately, I recommend using the water tray method. Using this method is very simple. You just need to place your potted sundews on a tray. Then, fill up the tray with water up to half of the height of the pot. Once some of the water is consumed, usually down to1/3 of the height of the pot, you add more water.

Most pots come with their own trays, but if needed, you can use any container as a tray. I use these large plastic trays to hold multiple of my plants.

Overall, you want to avoid materials such as terracotta, clay, unglazed ceramic, and metal for your water tray.

The Best Containers for Carnivorous Plants

If you have other carnivorous plants make sure to check my guides on pots and growing containers for Pitcher Plants and Venus Flytrap:

The Best Pots for Pitcher Plants Plus Potting Guide

The Best Pots for Venus Flytraps – Complete Guide

Sundew Care 101

Here is a short overview of the most critical consideration when growing Sundews.

  • Soil: Employ nutrient-free and fertilizer-free soil—a mixture of peat moss or sphagnum moss with peat or silica sand is a good option.
  • Lighting: Sundews need lots of light. You can employ artificial or natural light. The minimum amount of light exposure is 6 hours. Optimally, provide 8-12 hours of light or more.
  • Watering needs: keep the soil humid at all times. Employ the water tray method to keep the soil moist.
  • Feeding: Only feed indoor plants; outdoor plants capture their own food. When feeding, employ bugs and only feed once or twice a month.
  • Trimming: Use sharp scissors to trim dead leaves when necessary.
  • Humidity needs: Sundews thrive in humid environments
  • Use of Fertilizers: It is possible to fertilize Sundews, but it must be done with care. Do not fertilize unless you are experienced.
  • Temperature: Each specie of sundew has temperature range requirements, make sure to research the appropiate climate for your plant.
  • Dormancy: Some sundews require dormancy periods.