Guide to Venus Flytrap Dormancy: Indoors/Outdoors, Care, Tips

In their natural environments, Venus flytraps live through winters every year. When the temperature drops Venus flytraps go dormant (similar to hibernation). Venus flytraps need dormancy to remain healthy.

Venus flytraps must go dormant for 3 to 4 months, if they do not experience this period of inactivity the plant will end up dying. Venus flytraps go dormant when they experience cold weather of less than 45F (7C) for a minimum of three months. There are methods to achieve dormancy indoors and outdoors.

Some areas have the perfect temperatures for Venus flytraps to go dormant in the winter. However, not all of us (including me) live in an area with cold winters. In this article, I will share different methods and a guide to Venus flytrap dormancy.

Venus flytraps can live a few years without dormancy, but they will continue to weaken and eventually die. If you want to ensure your plant stays healthy, make sure it goes dormant every single year. The process is not very challenging and I have methods that work for every climate.

Venus Flytrap Dormancy Guide

The first step to getting started with Venus flytrap dormancy is to learn the basics.

20-45 F is the optimal temperature range for Venus flytraps to go dormant during the winter. To achieve dormancy, Venus flytraps must be exposed to temperatures below 45 F for at least 3-4 weeks. After starting dormancy, Venus flytraps must remain in cold temperatures for 3-4 months.

Venus flytrap Dormancy ConsiderationsRecommendation
The optimal temperature range for dormancy 20 – 45 F ( -6 – 7 C)
Minimum recommended temperature20 F ( -6 C)
Recommended length of dormancy3 – 4 months
How to begin dormancyIntroduce to shorter days and cold temperatures (below 45 F (7 C))
How to exit dormancyWait until the spring starts and introduce slowly to more sunlight and warmer days
Venus flytrap Dormancy Considerations

The table above has some critical information that you will need to determine the best method to make your Venus flytrap go dormancy.

Overall, there are three options to achieve dormancy and these instructions will help you determine the most suitable option.

  • Outdoor dormancy: If you are able to grow your Venus flytraps outdoors in the winter and your area has temperatures of below 45F for 3-4 months, then outdoor dormancy might be the best option. The only other consideration besides having a cold winter is the extreme temperatures. Avoid growing your venus flytrap outdoors when temperatures drop substantially. Temperatures below 20 F can sometimes harm Venus flytraps. Consider indoor dormancy if you believe temperatures can be too extreme during the winter months.

  • Indoor dormancy: Whether grown indoors or outdoors, Venus flytraps will require cold temperatures. Venus flytraps exposed to chilly temperatures in unheated garages, basements, and indoor patios can go dormant with great success. Also, cold indoor locations provide some protection from extreme temperatures, snow storms, etc.

  • Refrigerator dormancy: As a last resort you can place your venus flytrap in the fridge to make it go dormant. I only recommend this option if your location does not have a winter season. There is a method

It is ok if the temperatures rise to 50 F or above during the day or if there is a warm day in the middle of the winter. Temperature is never consistent in nature. Your Venus flytrap should remain dormant unless the temperature changes for a considerable amount of time.

The Best Timing for Venus Flytrap Dormancy

Venus fly traps go dormant whenever the winter starts.

The best time for Venus flytraps to go dormant is during YOUR winter. There is no need to time dormancy in any specific months. You can follow the instructions in the guides below when you are ready to start the dormancy process.

The most important timing consideration is consistency. Venus flytraps must go dormant every year at above a similar time. if you decide to induce dormancy, make sure you can continue that cycle every 12 months ago and again.

How to Identify Dormant Venus Fly traps

Once Venus fly traps start to go dormant, they change in appearance.

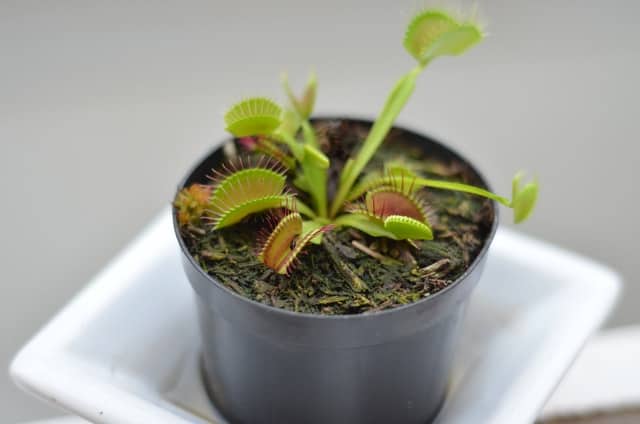
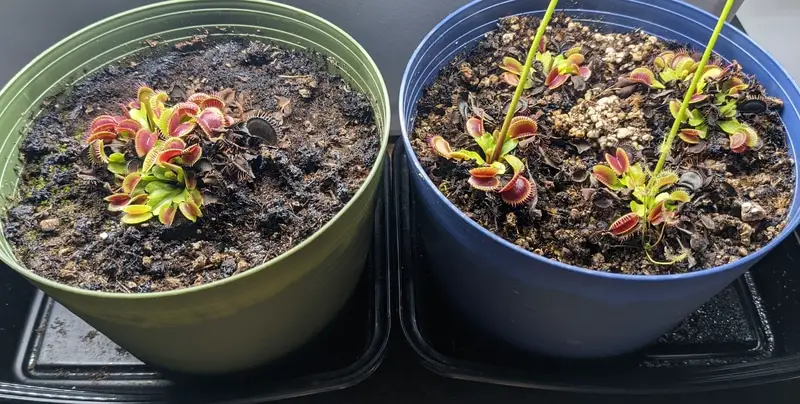
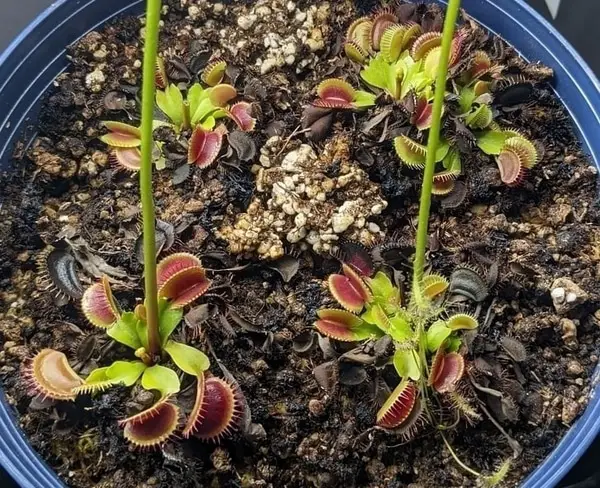
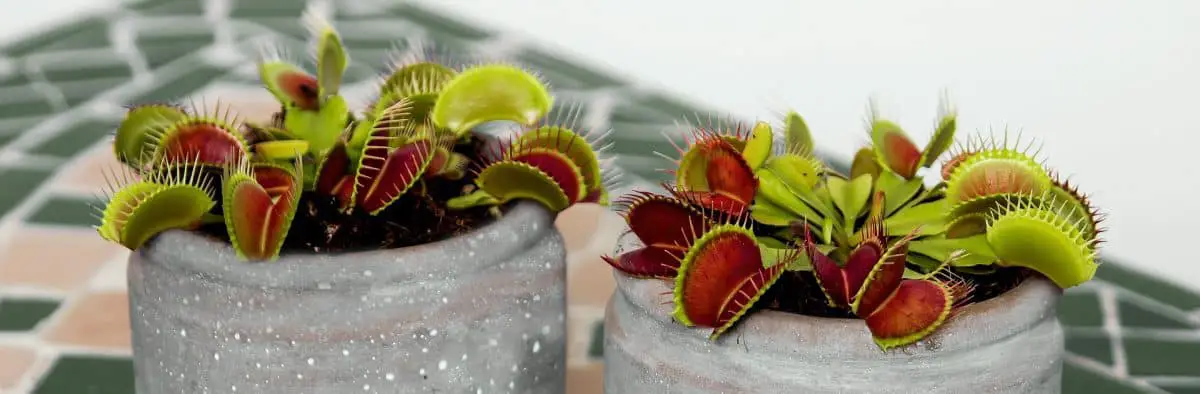
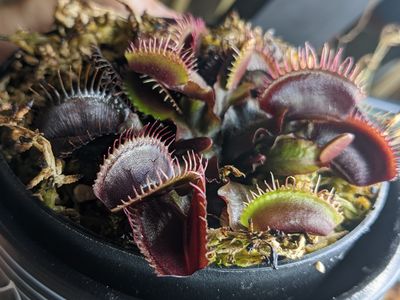
Dormant Venus fly traps have a similar appearance than dead plants. They loose multiple leaves, shrink in size, and stop growing for several months. If your are unsure your plant is dead or just dormant, continue to care for it until the end of dormancy.

A good rule of thumb is that dead Venus fly traps often look mushy and have no green leaves. And dormant Venus fly traps can only be in such state if there is cold weather.

Venus Flytrap Dormancy Outdoors

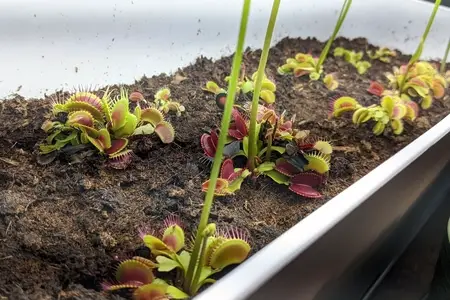
Venus flytraps going dormant outdoors is the optimal scenario. They naturally grow in the states of Soth Carolina and North Caroline where they have plenty of access to cold temperatures during the winter months.

For Venus flytraps growing outdoors already the process is very easy. Just leave your plant outside and the weather will trigger dormancy. As soon as the temperatures start to drop and the days become shorter, Venus flytraps will start going dormancy. You do not have to do anything else to trigger dormancy.

Venus flytraps go dormant after 2-3 weeks of chilly temperatures. You will notice some differences as your plant will likely look down and lose several leaves. It is completely normal. Do not worry too much and do not toss it. Dead and dormant venus flytraps look alike.

During the dormancy months, I recommend trimming dead leaves and following the complete care instructions I outline later in this article. Avoid moving the plant and creating additional stress and let the weather do its magic.

Venus flytraps will exit dormancy slowly as days become longer and temperatures start to rise. Once Venus flytraps are out of dormancy the spring will prompt them to start producing flowers and reproduce.

Venus Flytrap Dormancy Indoors

Venus flytraps can easily go dormant indoors as long as temperatures drop below 45 F.

For indoor dormancy, place your Venus flytrap in a cold location, such as a windowsill, an unheated garage, porch, basement, or any room that has a suitable temperature range (below 45 F). Venus flytraps will slowly go dormant after being exposed to chilly temperatures.

It usually takes 2-3 weeks to see the changes in your plant. The plant will likely die down and lose many leaves.

During the dormancy period, you can provide artificial or natural light to your plants. Technically, when Venus flytraps are completely dormant due to cold weather, they won’t require light. However, it is hard to know if your plant is 100% dormant when you can’t control the weather. For that reason, I recommend providing some lighting during dormancy to ensure your plant remains healthy.

After 3 months you can make your Venus flytrap exit dormancy. You can also wait longer 4 to 5-month dormancy are also acceptable.

Your plant will exit dormancy once it has access to warmer weather and more light. However, sudden changes can harm your plant. Slowly increase the lighting for your plant for a few weeks (like an extra hour every couple of days). Then, slowly start removing the plant from the cold location.

Once your plant is growing again in a warmer environment you will see significant changes as it starts to reflourish.

Refrigerator Dormancy

This method is reserved for extreme circumstances. For anyone that does not live in an area that has a cold enough winter, the dormancy method is really the only choice besides skipping dormancy.

If you are looking to keep your plant alive for many years (even decades), it is time to evaluate an alternate option. You can induce dormancy by placing Venus flytraps in the fridge. You can place your Venus flytrap and its pot in the fridge or remove all soil from your plant and place it in the fridge. These are the steps you need to follow to complete the process:

Start by getting some sulfur-based fungicide. Physan is a good option. Here is a link to the product on Amazon https://amzn.to/3vr9lGu It’s perfectly safe and not too expensive.

Then, make space in your fridge. Your plant will need to be there for at least three months before exiting dormancy.

Young and Mature Venus Flytrap Starting Fridge Dormancy

Method 1- Keeping The Pot

If you have enough space in your fridge I recommend keeping your plant in its pot. However, keep in mind that they can take up significant space depending on the size of the pot and the number of plants you own.

Materials

  • Space in your fridge
  • Distilled water
  • An air-tight container big enough to hold your potted plant
  • Scissors for trimming
  • Optional: Sulfur-based fungicide and spray bottle

Instructions

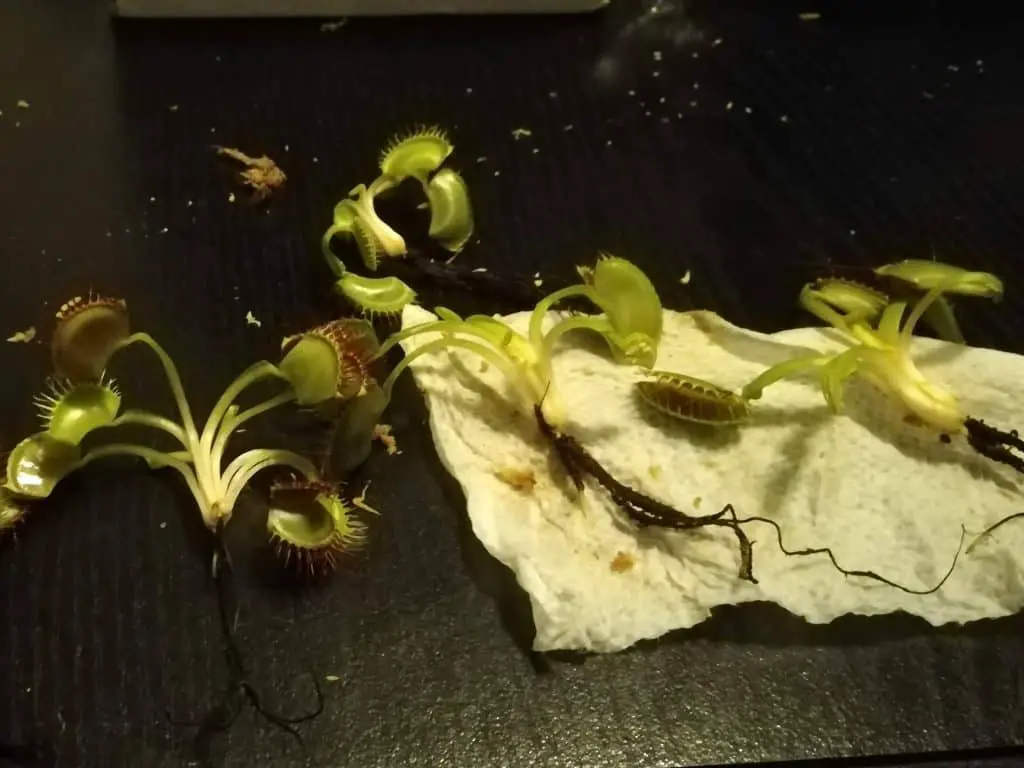
  1. Remove all black and dead leaves from your plant. Also, remove any foliage from the soil.
  2. Water your plant so the soil is humid
  3. Optional: spray your plants with fungicide throughout
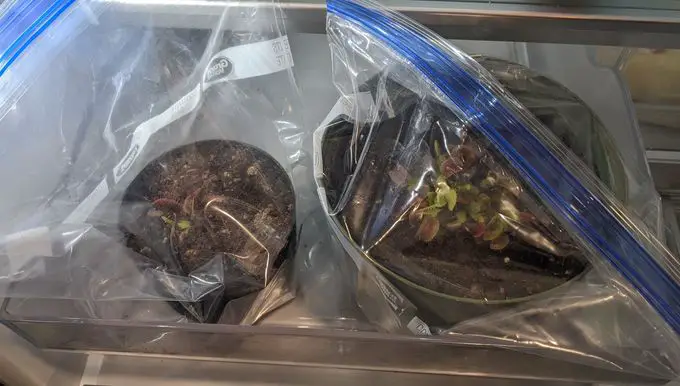
  4. Grab a large Ziploc bag air-tight container and place your whole plant with its pot inside.
  5. Seal the containers. Keeping it open will dry out the soil almost immediately and end up killing your plant.
  6. Place your plant inside the fridge (not the freezer)
  7. Keep the plants in the fridge and check on them every few days and watch out for mold, rotting, and not enough water.
  8. Water your plant when the soil is starting to dry out, but avoid overwatering
  9. After 3 months remove your plants from the fridge and reintroduce them to light and warmer temperatures slowly

Method 2 – Unpotting Your Plant

This method does not require much space for your plants but is slightly more challenging.

Required Materials

  • Distilled water
  • Long fibered sphagnum moss
  • Scissors for trimming
  • Fresh soil
  • Space in your fridge
  • Optional: sulfur-based fungicide and spray bottle

Instructions

  1. Unpot your Venus flytrap removing all the soil from the roots
  2. Trim dead leaves and roots
  3. Optional: spray your plant with a fungicide
  4. Grab sphagnum moss and moisten it with distilled water
  5. Wrap your Venus flytrap with the moss and place it inside an air-tight container like a Ziploc bag
  6. Seal the container and place your plant in the fridge.
  7. Keep the plants in the fridge and check on them every few days and watch out for mold, rotting, and not enough water.
  8. Water your plant when the moss starts to dry out by spraying distilled water.
  9. After 3 months remove your plants from the fridge and plant them into fresh soil
  10. Slowly reintroduce your plant to warm weather and light. I recommend taking 2-3 weeks slowly transition your plant from the fridge into its growing space.
Unpotted Venus Flytraps

Skipping Venus Flytrap Dormancy

Venus flytrap dormancy is an essential process that allows the plant to rest and remain strong in the growing season. Venus flytraps should go dormant every single year. However, it is not always possible to provide an appropriate environment for dormancy.

When Venus flytraps skip dormancy, their growth becomes stagnant compared to other Venus flytraps growing rapidly after dormancy. Without dormancy, Venus flytraps are also less likely to propagate. Venus flytraps that skip 2-3 yearly dormancy periods in a row weaken and eventually die.

Venus flytraps can skip dormancy as long as it is not a recurring practice. The plant will exhibit a slow growth rate but will eventually recover as it goes dormant in the years to come.

Skipping dormancy is a suitable choice in some specific circumstances, such as:

  • When growing seedlings or leaf cuttings/ pullings
  • When you just got a new plant
  • When you are a short-term Venus flytrap owner

This article covers the best strategies of how to skip venus flytrap dormancy if that is your only option.

Care During Venus Flytrap Dormancy

Care during dormancy is a bit trickier than during growing seasons. Here are some tips to ensure they complete dormancy healthy.

  • Watering: Continue to water your plant often, but be ready to lower the watering frequency. Dormant Venus flytraps consume less water. Make sure you feel the soil after watering to ensure it is only moist but not damped. Overwatering is a very common cause of death during the winter months.
  • Fertilizers: Do not fertilize Venus flytraps during dormancy. Generally is not recommended to fertilize these plants if you are a novice, but dormancy is discouraged for all.
  • Feeding: Avoid feeding your Venus flytrap during this period. If it catches a bug on its own, that is ok. But, do not feed it manually. Your plant is in a resting state and it does not require any additional nutrients.
  • Trimming: Carefully trim and remove dead leaves as they wither. removing dead leaves can help avoid the presence of mold and algae.
  • Repotting: Avoid repotting your plant in the middle or start of dormancy. However, repotting at the end of dormancy is a common and useful practice. Wait until your plant is about to exit dormancy to repot. This guide will teach you how to repot successfully.

Also, I recommend reading my complete venus flytrap care guide to ensure you don’t make any mistakes during dormancy. During the winter months, your plant will be more sensitive to any mistakes.

Dead vs Dormant Venus Flytrap

During dormancy, Venus flytraps change significantly. The plant reduces in size and it losses most of its leaves.

An increase in black leaves is completely normal during this period. Do not be overly worried about the changes in your plant. Some plants will experience drastic changes and others very mild ones.

The worst thing you can do is overreact and try to change things in your setup. Instead, I recommend following the dormancy care instructions I shared and ensuring you are providing the optimal environment. Continue to be patient and wait as the weeks and months go by. When the temperatures start to rise you will notice significant changes in your plant. New leaves will start to grow and your plant might even produce some flowers.

How to Water Carnivorous Plants – Complete Guide

I have grown carnivorous plants for several years and know watering them correctly is extremely critical to keep them alive. In this article, you will learn all you need to water your plant and keep it healthy.

Water carnivorous plants with pure, mineral-free water, such as distilled, reverse osmosis, or rainwater only. Carnivorous plants thrive in moist and waterlogged conditions. Some varieties require more water than others, but all carnivorous plants require humid environments.

The minerals present in most tap water and standard bottled water harm carnivorous plants and can kill them. In this article, you will learn how to select appropriate water and how much water your plant needs. For example, Sarracenia plants require a lot more water than Venus flytraps, so make sure you don’t treat all carnivorous plants the same in terms of watering frequency.

What Type of Water Should You Use for Carnivorous Plants

The water type you select is extremely critical. Carnivorous plants should only be watered with the following pure water sources:

  • Distilled water
  • Reverse osmosis water
  • Rainwater

The table below has a comprehensive list of water types and how suitable are they for carnivorous plants:

Water TypeSuitable for Carnivorous Plants
Distilled waterYes
Reverse osmosis waterYes
Rainwater Yes
Tap water Sometimes (depending on the composition)
Bottled waterNo
Boiled waterNo
Purified waterNo
Filtered waterNo (except when using the ZeroWater filter properly)
Spring waterNo
Safe Water For Carnivorous Plants

Some tap water and bottled water is not suitable for carnivorous plants. However, depending on the brand and where you live, the mineral content could be low enough for your plants. Unfortunately, the labels won’t give you much information. You would need to measure the Parts per Million (PPM) with a TDS meter to determine the mineral content in the water.

A TDS meter is a very simple tool you can buy on Amazon for less than $15 https://amzn.to/3g8VKLI. By dipping one of the ends of the tool into the water, you can measure its parts per million or PPM. Optimally you should employ water with 0 PPM. However, most carnivorous plants can handle some mineral levels.

What is the maximum amount of minerals your carnivorous plants can handle?

Sundews and Venus flytraps are the most sensitive carnivorous plants, while Nepenthes and Sarracenia can handle some minerals in the water and soil.

Maximum recommended PPM level:

Carnivorous PlantRecommended PPM Level
Venus Flytrap< 50 PPM
Sundew (Drosera)< 50 PPM
Nepenthes< 100 PPM
Sarracenia<120 PPM

Where I live the PPM in tap water exceeds 500 PPM, using my tap water will harm and kill carnivorous plants very quickly.

How to Get Water for Carnivorous Plants

I personally buy distilled water for my carnivorous plants, but you can decide what works best for you between distilled water, reverse osmosis water, or rainwater.

Distilled Water

Where to purchase: grocery store, pharmacy, water store

How to make: You can follow this easy method to make distilled water at home.

How to select: Most grocery chains and pharmacies will sell plain distilled water. I usually buy the 1-gallon jugs labeled as distilled water in Walmart or Kroger. When selecting a jug of distilled water, read the label. The distilled water must be completely pure. If the bottle says something like “enriched” or “added mineral for flavor” then it is not pure and can kill your carnivorous plants.

Reverse Osmosis Water

Where to purchase: Water stores and some pharmacies

How to make: You need a reverse osmosis system to make RO water

How to select: make sure to ask for pure reverse osmosis water. It is helpful to ask if it has additives or minerals for taste. The answer to all those questions should be “No”. Bottled water is commonly purified through reverse osmosis, but then minerals are added.

Rainwater

Rainwater is the only free option available if you have access to enough rain throughout the year. If you collect rain, make sure you do not store it in clay or metal containers. those materials can leach minerals to the ground.

How to Water Carnivorous Plants

This table summarizes the main considerations for watering the most common carnivorous plants. For more detailed explanations for watering Venus flytraps, Nepenthes, Sarracenia, and Sundews, read the sections below.

Watering FrequencyWater Tray MethodMineral SensitivityMaximum Recommended PPM
Venus fly trapKeep the soil humid at all timesRecommendedHigh50 PPM
Pitcher Plant (Nepenthes)The soil must be humid, but the plant should never sit in waterNot RecommendedMedium100 PPM
Sundew (Drosera)Keep the soil wet at all times Recommended High50 PPM
SarraceniaKeep the soil damp at all timesRecommendedMedium120 PPM
Watering Carnivorous Plants

Water Tray Method

Venus Flytrap Humidity

The tray method is a very common technique to water carnivorous plants. Make sure you are using a pot with drainage holes. Then, place the pot on an empty tray. Instead of water by adding water to the soil. Fill up the tray and let the soil soak the water from the tray.

Should carnivorous plants sit in water?

Carnivorous such as Sarracenia and most Sundews thrive continuously sitting on water. Venus flytraps can also sit on water for several days in a row until the tray dries out. Nepenthes on the other hand are prone to root rot and should not sit on water.

Venus Flytrap Watering Instructions

Water Venus flytraps often to keep them healthy. The soil must remain humid at all times; never let the soil dry out completely. You must also avoid soggy or waterlogged conditions as Venus flytraps are prone to rotting due to overwatering.

Some people believe Venus flytraps are aquatic plants, and unfortunately, end up killing them by watering them excessively.

I water my Venus flytraps by using the tray method. To be successful you need to add 1-2 inches of water to the tray. Then, let the plant consume the water. Do not water again until the tray is dry.

If you are unable to use the tray method, you can also water them from the top. Use pure water to moisten the soil all around until is humid. Touch the soil to confirm is wet, but not muddy. Then, let the plant consume the water and do not water again until the soil is slightly drier.

The presence of mold or algae in the soil are common signs of overwatering. Droppy Venus flytraps or excessive amounts of black leaves are sometimes due to underwatering.

Read this complete guide on Venus Flytrap Watering for a complete explanation.

Sundew (Drosera) Watering Instructions

Sundews thrive in waterlogged conditions. They should be watered with pure water and kept in humid to damped soil at all times. For best results, keep Drosera in trays filled with water up to one-half of the height of the plant’s pot.

If you grow Sundews indoors, consider using the tray method, but do not overfill the trays. Keeping the water level in the trays to 1/3 of the height of the pot can prevent overwatering.

Sundews are very difficult to kill by overwatering them; they are a lot more likely to suffer due to underwatering.

For complete instructions to water Sundews through the seasons, read this article I wrote for you 🙂

Nepenthes Watering Instructions

Watering pitcher plants can be tricky. They need enough water to start producing their own fluids (this is how you solve the lack of fluid in the pitchers). They need enough water to start producing their own fluids (this is how you solve the lack of fluid in the pitchers). This is due to the high humidity level necessary to grow a healthy pitcher plant, and the fact that the soil needs to stay humid at all times.

Pitcher plants require consistently humid soil at all times. However, the tray method is highly discouraged. Nepenthes are prone to root rot. Leaving Nepenthes sitting in water for long periods can be harmful.

To water Nepenthes, use distilled, rainwater, or RO water and moisten the soil throughout. Then, empty any excess water out of the tray. Test the soil every couple of days by touching it and water when the soil starts to dry out.

Sarracenia Watering Instructions

Sarracenia plants are extremely difficult to overwater. they actually thrive in wet soil year-round.

Employ the water tray method for Sarracenia. Fill up their trays with water until the soil is wet throughout. Then, let the water in the tray consume slightly and refill to the original level.

Sarracenia can live sitting in water without issues.

The Best Pots for Pitcher Plants Plus Potting Guide

Choosing a suitable container for your Pitcher plant will ensure your plant starts healthy and thriving. In this article, I will explain and teach you exactly which are the best containers for Pitcher plants.

Glazed ceramic, plastic, and resin pots are suitable for Pitcher plants. Young plants fit in 4-6 inch pots, while adults fit in 6-10 inch pots. The pots must contain enough drainage holes to avoid root rot and molding.

Since the color, size, and structure of the container you choose can affect the growth of your Pitcher plant, make sure to follow the recommendation in this table and read the next section for pot recommendations and advice.

Suitable materialsGlazed ceramic, plastic, resin, styrofoam
Unsuitable materialsConcrete, unglazed ceramic, clay, terra cotta, metal
Diameter4-6 inches for young plants, 6-10 inches for mature plants
DrainageMust contain drainage holes
ColorAvoid black pots in extremely hot locations
Considerations for Pitcher Plant Pots

Suitable Pots and Growing Containers for Pitcher Plants

I have tried several pots and found some that work great for my Pitcher Plants and other carnivorous plants.

You can find many different potting containers that will be safe and appropriate for Pitcher plants online or in shops. But, if you are looking to buy something that works right away, I recommend this pot if you are looking: https://amzn.to/3IYVGKU.

The link will take you to Amazon.com, where you can check the price. They are affordable (you can get multiple of them for less than 20 dollars), have proper drainage, and the plastic is safe for your plants. For the size, I recommend the 5.5 or 6.5-inch pots for a young Pitcher plant and the 7.5-inch pot for mature nepenthes. Also, choose the white pots for hot outdoor locations for better insulation.

These are the key considerations when selecting a pot for your Nepenthes:

Pot Material: When selecting a container, first make sure it is made of a safe material. Terra cotta, metal, clay, and concrete pots can leach minerals into the soil. Those minerals are usually harmless to most plants, but they are toxic for Pitcher Plants.

For best results, employ a material like plastic, resin, wood, or glazed ceramic. Those materials do not leach any minerals to the ground, and they provide insulation.

Drainage: Avoid pots with no drainage. The lack of drainage holes keeps the soil moisture too high and can kill your plant. Instead, use pots with multiple drainage holes.

Size: The size of the pot you use depends on the size of your plants. However, do not worry too much about the sizing as it is not critical. 4-6 inches work well for young plants, 6-10 inches for mature plants.

Color: The color of the pot can influence the insulation for your plant. Avoid dark color pots if you live in a very sunny location and are worried about extreme heat. White pots work best in sunny climates.

Hanging pots: Hanging pots are great candidates for Pitcher plants. Water can moisten the soil when pots are hanging and then exit the pot through the drainage holes. Hanging pots prevent your plants from sitting in water for extended periods.

Hanging pots are not mandatory. However, I do recommend getting rid of the tray. Do not use a pot tray. Instead, let the pot drain any excess water immediately. Technically, pitcher plants can sit in water for short periods, but it is risky as you have to be measured.

Pitcher Plant Potting Guide

When potting or repotting your pitcher plant, you will need a handful of important elements: carnivorous plant soil, pure water, a pot, and a pruning tool. Employing the wrong ingredients can end up harming your plants.

The timing for repotting and potting a Pitcher plant is also essential.

As a general rule, repot pitcher plants every one to two years. Replace the old soil with new media to promote growth and prevent rotting. If the plant outgrew its original pot, upsize.

Make sure you have the correct soil, water, and pot before you get started by going over the requirements. Then, watch the video for a step-by-step guide.

Avoid standard potting mixes, employ carnivorous plant soil

Pitcher plants are unique in appearance and unique in their specific soil requirements.

Never plant Pitcher plants in standard potting mixes, such as Miracle-Gro, garden soil, or cactus soil. Always employ carnivorous plant soil; it has low mineral content and usually has elements that help drainage and aeration.

Nepenthes are very sensitive to minerals. Any type of nutrients present in the soil or the water can be very harmful to these plants. Pitcher plants thrive in low-nutrient environments.

Pitcher plants require soil that preserves moisture and has drainage. Sphagnum moss, peat moss, orchid bark, perlite, and horticultural sand are common elements in most Pitcher plant soil mixes like, for example, a 2:1 combination of long-fibered sphagnum moss and silica sand.

If you still have questions about the soil requirements for Pitcher plants, make sure to read my full guide on the soil.

Only water with distilled water or rainwater

Tap water and most bottled water contain too many minerals and nutrients to be suitable for nepenthes. These plants require low mineral water. To keep your plants healthy, you should employ any source of pure water, such as:

  • Rainwater
  • Distilled water
  • Reverse osmosis water

Technically, Pitcher plants can withstand some amount of minerals in the water. However, unless you are measuring the ppm water content, avoid tap water, stream water, bottled water, etc.

Pitcher Plant Potting Instructions

Pitcher Plant Care 101

Growing Pitcher plants can be a challenge. It can be done when following specific instructions. The table below contains a summary of the critical highlights of Pitcher plant care. And, if you are looking for more information on pitcher plant care guide, read this complete guide. 

Care ConsiderationRecommendation
Lighting Requirement:More than 10 hours of light exposure through natural or artificial light.
Watering Requirements:Only employ distilled water, rainwater, or reverse osmosis water.
The soil must be humid at all times. Avoid the tray method
Bog gardens are suitable options.
Mastering watering is critical to keeping your plant healthy. My guide on watering Pitcher plants contains the complete instructions and best practices.
Soil:Employ nutrient-free soil:
A mixture of peat moss or sphagnum moss and perlite or silica sand.
Temperature:Common temperature range during the growing season: 60 – 80 F (15 – 27 C)
Humidity:> 50% humidity level is recommended
Trimming:Occasionally trim dried up leaves and flowers. This article explains the trimming process.
Feeding:Pitcher plants capture bugs on their own. There is no need to feed the plant manually.
Fertilizers:Not required.
Pots:Employ plastic, glazed ceramic, or glass pots with drainage.
Repotting:Repot once a year to promote growth.
Dormancy:Some pitcher plant varieties require dormancy.
Outdoor vs. Indoor growth:It can be grown in both outdoor and indoor environments
Pitcher Plant Care

The Best Containers for Carnivorous Plants

If you have other carnivorous plants make sure to check my guides on pots and growing containers for Sundews and Venus Flytrap:

The Best Pots for Sundews Plus Potting Guide

The Best Pots for Venus Flytraps – Complete Guide

The Best Pots for Venus Flytraps – Complete Guide

Venus Flytrap Pot

Selecting the wrong pot or growing container for your Venus flytrap can harm or even kill it. In this article, I will share a guide for selecting the best pots for your Venus flytrap.

As a general rule, plastic, styrofoam, or glazed ceramic pots are suitable for Venus flytraps, while terra cotta, concrete, or unglazed ceramic pots should be avoided. Venus flytraps prefer tall pots 4-6 inches in diameter and at least 4 inches in depth.

The size, color, and material of the pot can affect your plant’s health. I experimented with several types of pots over the years and have followed many different pieces of advice. This article will share a guide to picking the best containers for your Venus flytrap.

When selecting a pot for your Venus flytrap, make sure to follow these considerations:

Suitable materialsGlazed ceramic, plastic, resin, styrofoam
Unsuitable materialsConcrete, unglazed ceramic, clay, terra cotta, metal
Diameter3-6 inches for single plants, 6+ inches for multiple
Depth4 inches is the minimum recommended depth
DrainageMust contain drainage holes
ColorAvoid black pots in extremely hot locations
AirflowAvoid closed containers, such as terrariums and domes, at all costs
Venus Flytrap Growing Containers and Pots Guide

The Best Containers and Pots for Venus Flytraps

I have tried several pots over the years and found some that work great for Venus flytraps and other carnivorous plants.

These pots are great for Venus flytraps: https://amzn.to/3IYVGKU.

The link will take you to Amazon.com, where you can check the price and choose a color. They are affordable (usually less than 20 dollars), have proper drainage, are tall enough to promote growth, and the plastic is safe for your plants. For the size, I recommend the 5.5 or 6.5-inch pots for a single plant and the 7.5-inch pot for multiple plants. Also, choose the white pots for hot outdoor locations for better insulation.

The product links I provide are for reference, as many other pots can fulfill the requirements of Venus flytraps 😉

In the upcoming sections, I will explain the importance of selecting the appropriate material, size, color, and drainage for your pot, including some tips from a fellow carnivorous plant hobbyist. The information will help you select the best pot for your plant! 🙂

You can repurpose containers and use them as plant pots or buy some in gardening shops. I grow several different carnivorous plants and like to keep the pots uniform.

Container Material

Venus flytraps are very picky in which soil, water, and pot they require. They are intolerant to minerals and nutrients, making finding a suitable growing container difficult.

The best pot materials for Venus flytraps are plastic, styrofoam, or glazed ceramic pots. These materials provide insulation from extreme temperatures and are harmless to your plants. They do not leak any minerals into the soil. It is not common to find styrofoam plant pots, but some people repurpose styrofoam cups as pots for small plants. They are an inexpensive option, and they provide the best insulation (remember to add drainage holes).

Over time terracotta, unglazed ceramic, concrete, or metal containers leach harmful minerals into the soil. Those added minerals build up in the ground and can eventually start killing your Venus flytrap. An increase in black leaves or the appearance of yellow leaves is sometimes a sign of mineral burns caused by using the incorrect pot material, soil, water, or a combination of several.

Glass pots are acceptable containers. They do not leak any type of element into the soil, but insulation can be a challenge. Make sure to avoid extreme temperatures if using metal or glass pots.

Pot Size

Choose a pot that matches the size of the Venus flytrap, but opt for larger pots rather than small ones. Small pots can restrict your plant’s growth. An adult Venus flytrap grows best in the following dimensions:

  • Pot diameter: 4 to 6 inches (10.5cm – 15.2 cm)
  • Pot depth: Over 4 inches (10.2 cm)

Young Venus flytraps that are only 1 to 2 years old can grow in 2 to 3 inches in diameter pots.

If you wish to grow multiple Venus flytraps in the same pot, choose large pots of at least 6 inches in diameter. Currently, I have 4 Venus flytraps growing in an 8-inch pot. They are comfortable in the space, and they make the pot look full and interesting.

Drainage

Venus flytraps require a very moist environment to stay healthy; however, they can be prone to root rot when drainage is not optimal.

Always employ a pot with drainage holes to grow Venus flytraps. The drainage holes will allow you to water your plant from the bottom and prevent rotting, molding (this is how you can get rid mold) , and algae.

It is possible to grow a Venus flytrap in a container without drainage, like a terrarium, for example, but it is challenging. As a beginner carnivorous plant grower, I wouldn’t suggest experimenting with terrariums just yet. 

Color

The color you choose for your pot is not as critical as all other factors. However, you should consider the weather in your area.

Choosing a light color pot can help with insulation in an extremely sunny location. I live in Arizona and try to use white pots for all my outdoor plants.

Airflow

Closed containers, such as domes or terrariums, can be very harmful to Venus flytraps. These plants appreciate the extra humidity, but they are prone to rotting in soggy environments. Without the appropriate drainage and airflow, Venus terrariums often kill the plant or cause mold or algae issues.

Additional Considerations

Water Trays

To water Venus flytraps appropriately, you will most likely need water a tray. Most pots come with their own trays, but if needed, you can use any container as a tray. I use these large plastic trays to hold multiple of my plants.

Overall, you want to avoid materials such as terracotta, clay, unglazed ceramic, and metal for your water tray.

Soil

Now, let’s select an appropriate potting medium. Venus flytraps can’t grow in standard compost or potting soil due to the richness in nutrients. Instead, you must employ a mixture of these nutritionless elements:

  • Long fibered sphagnum moss
  • Peat moss
  • Silica sand
  • Perlite

To make Venus flytrap soil combines one type of moss with a draining agent (sand or perlite). For example, you can employ a 2:1 ratio of peat moss and perlite. Or a 2:1 ratio of long-fibered sphagnum moss with sand. The ratio depends on personal preference, but a 2:1 or 4:1 ratio are common choices.

When selecting the soil, make you find the correct type. Here is a guide that lists the best soil options.

It is acceptable to employ pure peat or sphagnum moss as the ground for Venus flytrap. However, it is encourage to add sand or perlite to provide better drainage and aeration.

You can buy the ingredients listed above and make your own Venus flytrap soil or buy it online. If you would like to make it yourself, this article has complete instructions.

Here is the amazon link of the carnivorous plant soil I use for my carnivorous plants. It is affordable and very effective in keeping your plants healthy: https://amzn.to/3Nhy4qM

Venus Flytrap Care 101

Growing a Venus flytrap in the right setup ensures your plant will stay healthy and thrive. This list contains the most critical considerations when growing Venus flytraps. Read my complete care guide here.

LightProvide over 6 hours of sunlight or artificial lighting
SoilEmploy carnivorous plant soil
PotUse plastic or glazed ceramic pots with drainage
WaterWater frequently to keep the soil humid at all times with distilled or rainwater.
TemperatureAvoid temperatures below 20F and above 100F
LocationFor best results, grow Venus flytraps outdoors
Venus Flytrap Care

The Best Containers for Carnivorous Plants

If you have other carnivorous plants make sure to check my guides on pots and growing containers for Sundews and Pitcher plants:

The Best Pots for Sundews Plus Potting Guide

The Best Pots for Pitcher Plants Plus Potting Guide

Recommended Products for Growing Carnivorous Plants

Finding the best pots, lights, and soil for carnivorous plants is difficult. I have grown carnivorous plants for over 5 years, and these are the products I use. The links will take you to Amazon to view the prices and full specs:

Do Venus Flytrap Eat Fruit Flies: Efficacy and Alternatives

Having pests at home is very annoying and finding a solution is not always obvious. When fruit flies become a problem, some people recommend employing Venus flytraps to control the bug population. I own many types of carnivorous plants, and in this article, I will share how effective each plant is in controlling fruit flies.

Venus flytraps consume fruit flies, but they are not an effective pest control for this type of insect. Most mature Venus flytraps are too big to capture fruit flies effectively. Other carnivorous plants offer a better solution to control fruit flies, gnats, and other small insects.

Now, let’s explore the best options to control a bug infestation at home.

Venus Fly Trap as Pest Control

Venus flytraps consume a wide array of insects. They eat flies and many other bugs, such as ants, gnats, worms, and spiders.

Venus flytraps are not effective bug controllers (especially for fruit flies) due to their size and their limited number of leaves. However, other carnivorous plants, such as Sundews, Pitcher plants, and Butterworts, are more effective at pest control.

Main Challenges

  • Small insects such as ants, fruit flies, and gnats can escape from inside the traps of Venus flytrap leaves.
  • Each Venus flytrap only grows up to about 10 traps, so it can only capture a very small number of insects at a time
  • The digestion process for Venus flytraps can take more than a week or two. Traps remain closed and inactive for many days after trapping an insect.
  • Venus flytraps require a dormancy period. During the winter they go into a dormant state and lose most of their leaves. During dormancy, they are not active predators.

You can still employ Venus flytraps to control your bug population at home, but you must remember that they can only consume a handful of insects every month. I grow Venus flytraps because I love them as plants, and their predatory nature is only a plus.

The Best Carnivorous Plants to Control Fruit Flies

These four types of carnivorous plants are very effective at controlling pests:

  • Mexican butterworts
  • Sundews (Drosera)
  • Nepenthes pitcher pant
  • Sarracenia

Now, let’s explore each of the options:

Mexican Butterworts

A type of carnivorous plant that can easily lure insects because of the sticky substance found in their leaves.

These carnivorous plants produce adhesive leaves that characterize by having a shiny glare. Insects become attracted by the leaves, and as soon as they land on the plant, they become stuck.

They are often found in humid regions that are mountainous, such as Central America and South America, and Mexico.

Butterworts are very effective at capturing flying insects, especially tiny ones, such as fruit fruitflies.

Pros:

  • Butterworts can be grown indoors
  • Depending on the climate, they can be grown indoors or outdoors and do not require a temperature change to experience dormancy.
  • They can capture tons of tiny insects

Cons:

  • Butterworsts are harder to find plants. However, some online nurseries do sell them.

Sundews

Sundews or Drosera have tentacles in their leaves that secrete adhesive substances to capture prey.

There are dozens of different Sundews out there. I recommend researching the specific variety before purchasing. Some sundews can be grown indoors, while others require full sun. Also, each type of Sundew has different requirements in terms of temperature and dormancy (not all Sundews need dormancy).

Some sundews like the Cape Sundew or Drosera Natalesis are very easy to care for. You can buy Cape Sundews online for an affordable price. Here is a link to a shop.

Pros:

  • Sundews are easy to grow compared to other carnivorous plants
  • Several varieties of sundews can be grown indoors
  • Some varieties of Drosera do not require dormancy
  • An average adult Drosera plant can capture multiple insects in each leaf

Cons:

  • They need insects to stay heathy. If they do not consume enough bugs they end up suffering.
  • Depending on the variety they can be small in size, which limits their capacity to capture insects.

Sundews and Mexican Butterworst are effective bug controllers for small insects such as gnats, fruit flies, and mosquitoes in indoor and outdoor locations. Some varieties are more effective than others, but most adults can trap multiple insects in each of their sticky leaves.

Nepenthes Pitcher Plant

At the end of their leaves, Nepenthes have pitcher-like structures that serve to capture insects.

Nepenthes attracts bugs with sweet nectar on the edge of their pitchers. Insects come to the pitchers to consume the nectar, but they can slide inside the pitcher full of digestive enzymes if they walk too far. Once bugs fall inside the pitcher, it is tough to escape as most insects end up drowning in the digestive juices.

Nepenthes can capture multiple insects at a time. Depending on the plant’s size, a single pitcher can hold dozens of insects.

Pros:

  • Pitcher plants can capture many insects at a time
  • Due to their size, Pitcher plants are not limited to consume a specific size or type of insect.

Cons:

  • Under less than optimal conditions, pitcher plants can stop roducing pitcher and lose the bug trapping power

Sarracenia

The leaves of Sarracenia plants are tall pitcher-like structures that capture insects.

They attract bugs with sweet nectar and consume prey with digestive juices inside their leaves.

Sarracenia can act as a pest controller in outdoor locations. Since Sarracenia plants require lots of sunlight, it is challenging to grow them indoors. I would not recommend employing them for indoor pests, as Sarracenia won’t live very long without the proper lighting.

Adult Sarracenia pitchers are very large and can hold dozens of insects.

Pros:

  • Sarracenia can capture many insects at a time
  • Due to the size if their pitchers, Sarracenias are not limited to consume a specific size or type of insect.

Cons:

  • Sarracenia won’t help with indoor pests as they are extremely hard to grow indoors.

Sarracenia and Nepenthes plants are effective bugs controllers in outdoor locations. These plants can hold large amounts of insects in their pitchers. For tangible results, it is recommended to employ carnivorous plants with other pest control practices.

Carnivorous Plant Care

Owning a carnivorous plant is an enjoyable and unique experience. However, keeping them alive and healthy can be a challenge for novice growers.

Carnivorous plants require specific care consideration to live. Here is a list of the most important aspects of growing carnivorous plants:

Watering

Carnivorous plants require water that contains very low mineral content. Most tap water and bottled water is unsuitable for carnivorous plants. Such water can cause mineral burns and eventually kill the plant.

Only water carnivorous plants with reverse osmosis water, distilled water, or rainwater.

The watering frequency for each type of carnivorous plant varies. However, most of them will require frequent watering.

Venus flytraps are often kept in a tray sitting in water to ensure the soil stays humid. Sundews require more water and are commonly placed in waterlogged conditions.

Soil

Carnivorous plants are intolerant to the minerals, additives, and fertilizers present in most soil blends. Never employ MiracleGro, succulent soil, cactus soil, or any standard potting soil.

You should only pot carnivorous plants in carnivorous plants soil. You can make carnivorous plant soil by buying the ingredients and combining them or by it online.

Each variety of carnivorous plant might benefit from a slightly different mix. However, most carnivorous plants blends include peat moss, long fiber sphagnum moss, perlite, or sand.

You can find more information about soil and where to buy it in this guide: Soil Guide.

Lighting

Proper lighting is a critical aspect of carnivorous plants. The vast majority thrives under very sunny and bright conditions. Some plants grow best indoors under grow lights and other outdoors with sunlight.

Dormancy

Some carnivorous plants require a dormancy period. Dormancy is similar to hibernation. The plant “rests” for a few months as it loses most of its leaves. After dormancy, they reflourish stronger than ever.

Make sure to research the dormancy requirement of your plant. Dormancy is an essential part of the plant’s development. Skipping dormancy or providing improper care during such a period can end up harming the plant.

Feeding

Outdoor carnivorous plants capture bugs on their own. Indoor plants need to be fed at least once a month to supplement their diet.

Even though carnivorous plants do not NEED to consume insects to survive, they benefit significantly from the extra nutrients.

This section covered a general overview of carnivorous plants care. However, there is a lot more to cover. In this article, I cover a complete guide to Carnivorous Plant Care.

Pest Control Solutions to Eliminate Fruit Flies

1. Use fruit flies traps.

This option is a chemical-free solution. The traps are straightforward to use and effective.

The process is simple. Add a bait inside the plastic trap and wait until the gnats and fruit flies enter. Once they enter, they are unable to escape.

I have seen disposable options in the grocery store, but personally, I prefer the reusable kind. You can buy a set of reusable fruit flies traps online and start reducing your fruit fly infestation. Here is a link to a good option you can find on Amazon.com.

2. Use a Fruit fly spray eliminator.

Many brands offer multi-purpose bug-eliminating sprays and some specific to fruit flies and gnats. Consider using one of these solutions from the grocery or hardware store.

3. Sanitize the area.

This tip won’t only help you eliminate fruit flies but also prevent future infestations.

Make sure to wipe counters and surfaces where fruit flies linger. Eliminate any organic residue to stop attracting bugs.

4. Use a food net to isolate insects from your meal.

Use a mesh-type food net to keep the food attracting fruit flies away from the infestation. Also, to avoid luring more insects, make sure to toss any fruit or other food that might be rotting or close to spoiling.

5. Store all or at least most food in the fridge.

Not all food needs to be kept in the fridge. But, if you have a bug infestation, you might want to consider maintaining food products out of reach by placing them inside the refrigerator.

Pitcher Plant Feeding Guide: Food Options, Steps, and Tips

As a newbie pitcher plant owner, I learned how to feed my pitcher plants. After feeding them regularly for several months, I learned what works best and the great benefits that arise from feeding your plant. In this article, I will share a solid strategy to feed your Pitcher plants and keep them thriving.

Feed Pitcher plants by dropping live insects, dead insects, fish food, or diluted fertilizer such as Maxsea inside the pitchers. As a general rule, feeding Pitcher plants once or twice a month can provide substantial benefits. Avoid human food and insects that are too large or can eat their way out of the pitcher.

Now, let’s get into the details on how to feed your plant!

Easy Steps to Feed Pitcher Plants

  1. Obtain the correct food for Pitcher plants: live bugs, dead bugs, fish flakes and fertilizer are common choices.
  2. Get a hold of the food. Live insects might require you to employ tweezers. Fertilizers often need to be diluted beforehand.
  3. Drop a couple of insects, fish flakes, or about 5 drops of diluted Maxsea inside a pitcher.
  4. Consider repeating the process for multiple pitchers, but feeding 1-2 pitchers will provide enough nutrition for the full plant
  5. Observe the pitchers in the next few weeks and repeat the feeding process every 2-4 weeks.

Do you have to feed a Pitcher plant?

In the outdoors, pitcher plants trap enough insects to stay healthy. They lure bugs with sweet nectar and, after trapping them, they extract nutrients from their prey.

Feeding pitcher plants is not a requirement as they produce their own food through photosynthesis. Their predatory nature was developed since they grow in very nutrient-poor environments. The nutrients they extract from the insects they capture provide and extra boosts, just like fertilizer.

Outdoor pitcher plants capture plenty of insects, and they do not usually need to be fed. Indoor pitcher plants do benefit from the occasional meal.

Placing Nepenthes or Sarracenia in windowsills can offer them the chance to capture insects.

How much to feed a Pitcher plant?

You can feed pitcher plants employing 1-2 bugs for each pitcher every 2 to 4 weeks. A couple of insects are more than enough to provide the extra boost in nutrients.

Nepenthes, as well as Sarracenia, capture large amounts of insects when they grow outdoors. Some pitchers can sometimes get close to being full. So, do not be too concerned about the amount of insects pitcher plants can consume.

Pitcher Plant Feeding Tips

Make sure to follow all the tips below when feeding your Pitcher plant; they will help you avoid common mistakes.

  • Avoid spilling fertilizer or fish flakes in the soil: Never drop any of these elements in the ground. Pitcher plants are intolerant to nutrients in the soil. Adding fertilizers or the nutrients from fish flakes to the soil can cause mineral burns in the soil and the leaf, and could kill your plant.
  • Do not leave dead bugs in the soil: If you drop a dead bug in the soil, make sure to pick it up. The insect can take a long time to decompose and might attract mold or fungi.
  • For best results you must feed pitchers that have fluids: Without the digestive enzymes inside the pitchers, your plant won’t be able to absorb the nutrients. Pitchers with fluids are a sign of health.
  • Employ bugs with lots of soft tissue: Some insects provide more nutritional value than others. Mealworms and bloodworms are very soft and contain tons of nutrients. Ant and gnats offer benefits, but they are pretty tiny for most pitcher plants.
  • Do not drop water inside the pitchers: When feeding, be careful not introducing water or any other element inside the pitchers that are not food. Adding water can dilute the digestive enzymes inside the pitchers and prevent your plant from consuming bugs. This article on when to fill pitcher plants with water can explain the process in more detail.
  • Change the food you employ if it attracts mold or causes the leaf to die. Always continue to monitor your plant and check if the food you are employing is working. It is normal for pitcher to wither sporadically, but check for patterns.

What to Feed and Not to Feed Pitcher Plants

Pitcher plants are not picky in terms of what they like to consume. You can employ almost any type of bug and also fish flakes or diluted fertilizer.

In this section, I explain the basics of what food to employ. If you want a detailed guide for beginners, check this article: What To Feed a Pitcher Plant: A Comprehensive List. 

Insects as Food

Gnats, ants, crickets, mealworms, bloodworms, grasshopper, butterflies, moths, beetles, spiders, rolly pollies, mosquitoes, bloodworms, and ladybugs are suitable food options for Pitcher plants.

You can employ live or dead bugs to feed your pitcher plant safely. The list above is not comprehensive; any insect is suitable. As a personal recommendation, I try to avoid large live caterpillars that can eat your plant’s leaves.

You can collect insects from your home or the park, but you can also buy feed. Most pet stores, including Petsmart and Petco, sell dried-up mealworms, bloodworms, crickets, and live insects. They are usually available in the reptile aisle.

Also, you can buy freeze-dried insects online. A whole container is usually less than $15 and will last you ages. Here are two links to some feed I have used; both are incredibly nutritious:

Fish Flakes as Food

Feeding fish flakes to Pitcher plants can provide the same benefits as insects. They are highly nutritious, and they last a long time. A single bottle can last you for months or even years!

Here are some links to some suitable fish food you can buy online.

Employing Fertilizer

Never fertilize the soil of Pitcher plants, instead consider feeding your plant with a few fertilizer drops. A safe fertilizer for Pitcher plants is Maxsea.

Before using Maxsea, you need to dilute 1/4 of a teaspoon (Maxsea) in 1 gallon of distilled water. Then, you can use a few drops of this mixture to feed your plant.

This same dilution can be employed for other carnivorous plants. Here is a link to the Maxsea fertilizer if you are interested in such an option.

Never Employ Human Food for Pitcher Plants

Avoid any of the following as food for your Pitcher plant.

  • Hamburger
  • Chicken
  • Sausage
  • Salami
  • Raw meat
  • Candy
  • Fruit
  • Steak
  • Hotdog
  • Cheese
  • Any animal that is not an insect or a spider

Can Pitcher plants eat human food? Human food is not appropriate for Pitcher plants or any other carnivorous plants. Pitcher plants won’t be able to consume such complex food. Instead, after an unsuccessful digestion attempt, the pitcher will wither and die.

Can Pitcher plants eat animals other than insects? Pitcher plants can digest meat from tiny animals such as rodents, birds, or frogs in the wild. However, this behavior is not very common; their diet almost always relies on insects.

Never attempt to feed your pitcher plant any animal other than insects or spiders. Larger animals will rot inside the trap and can cause unpleasant odors, mold, and rotting.

Pitcher Plant Care Information

Besides feeding your plants, make sure to provide optimal care by going over this list:

Lighting: This consideration is one of the most critical ones. Expose your plant to more than 10 hours of natural or artificial light. LED or fluorescent lights are suitable for indoor locations; 6500 K is a proper light temperature.

Watering: Only employ pure water sources such as distilled water, rainwater, or reverse osmosis water. Always water from the top and keep the soil humid at all times. Avoid the tray method for Nepenthes. Since watering your plant correctly is critical, this guide explains the process in great detail.

Soil: Do not employ traditional potting media such as MiracleGro, cactus soil, or succulent soil. Instead, use nutrient-free carnivorous plant soil. Carnivorous plant soil can be composed of many elements, such as peat moss or sphagnum moss and perlite or silica sand. The ratios are not critical, but a 3 to 1 ratio of moss and perlite is a suitable mixture. You can purchase carnivorous plant soil online for an affordable price (here is the one I use)

Humidity: Pitcher plants thrive in humid environments. A humidity level of over > 50% is optimal. Still, most plants can adapt to lower humidities and might benefit from a humidifier.

Trimming: It is not required to prune Pitcher plants, but you can remove dead leaves to promote growth.

Feeding: Outdoor Pitcher plants capture bugs on their own. Indoor Pitcher plants need to be fed at least once a month to supplement their diet.

Fertilizers: Avoid fertilizing unless you have researched the detailed process.

Repotting: Repotting is not critical, but yearly repotting can promote growth.

Dormancy: Some pitcher plant varieties require a yearly dormancy. Nepenthes, tropical pitcher plants do not require dormancy.

Make sure to research your specific species of pitcher plants as care considerations may vary.

For more information on growing pitcher plants, make sure to download the complete care sheet here: Ultimate Pitcher Plant Care Guide.

What To Feed a Pitcher Plant: A Comprehensive List (Plus Feeding Tips)

Pitcher plants extract key nutrients from the insects they capture. In this article, I will share with you a comprehensive list of food options to keep your Pitcher plant healthy.

Pitcher plants can eat and be fed almost any live or dead insects or spiders, such as ants, gnats, fruit flies, house flies, months, and rolly pollies. Also, pitcher plants can benefit from fertilizer pellets. A single bug once a month is enough to keep a Pitcher plant thriving.

If you are unsure how to feed a pitcher plant or do not know what type of food to employ, keep reading for the complete list and instructions.

Pitcher plants are one of my favorite carnivorous plants due to their spectacular modified leaves. I have grown carnivorous plants for several years and have found great success when feeding pitcher plants. In this guide, I will share with you suitable food options and best practices to keep pitcher plant healthy and thriving.

Pitcher plants, like all other plants, produce their food through photosynthesis. They do not rely on capturing bugs to survive; they only capture insects to extract key nutrients that give them a boost. It is a similar effect to employing fertilizers.

Since pitcher plants grow in areas characterized by low nutrient levels, they need to extract elements from insects. The insects Pitcher plant capture should be considered a fertilizer rather than food.

In many cases, you can let Pitcher plants capture their own insects. They will thrive as long as they capture at least a couple of bugs every month during the growing season.

When Pitcher plants are unable to capture bugs, it is recommended to feed them. Bugs act as a fertilizer as they help boost growth.

Here is a comprehensive list of food options for Pitcher plants; some are insects, others are artificial options:

  • Flies
  • Cricket
  • Mealworms
  • Yellow Jackets
  • Caterpillars
  • Bees
  • Butterfly
  • Bloodworms
  • Fruit flies 
  • Gnats
  • Ants
  • Worms
  • Rollie pollies
  • Beetles
  • Spiders
  • Ladybugs
  • Grasshoppers
  • Mosquitos
  • Cockroaches
  • Moth
  • Slug
  • Fish food
  • Fertilizer pellets

Pitcher plants are not picky in what they can or cannot eat. They will be happy consuming most insects and spiders. In the wild, Nepenthes and Sarracenia attract a wide range of creatures. On most occasions, they lure flying insects, but crawling insects are also common prey.

Feel free to collect bugs from the garden or a park and feed your plant.

Pitcher plants can consume live or dead bugs. Both options provide nutritional benefits and are available at most pet stores. For example, you can employ insects, such as mealworms, crickets, and bloodworms which are incredibly nutritious.

Personally, I like employing highly nutritious insects with lots of soft tissue, such as crickets or mealworms. But, overall, most bugs provide enough nutrients to encourage growth for your plant.

Can Pitcher Plants eat slugs and caterpillars? Pitcher plants can capture and consume slugs, caterpillars, and other similar insects. However, employing large slugs or caterpillars can be risky. These insects (if big and robust enough) can eat their way out of the pitcher and harm Pitcher plants.

Can Pitcher plants eat cockroaches? Pitcher plan can eat cockroaches without a problem, as average cockroaches fit in medium-sized Pitcher plants. However, Pitcher plants do not provide a pest control solution.

Besides insects, there are also artificial food options such as fish food and fertilizer pellets. You can drop bits of fish food or fertilizer pellets inside the pitchers of your plant one every month. If you decide to employ this option, I recommend doing a trial run. Start by feeding a single pitcher and verify there are no negative effects.

Where To Get Insects for Your Pitcher Plant

If you decide to employ dead bugs that you collected, make sure to inspect the insect before feeding your plant. Avoid any dead bug that is already attracting mold. You want to avoid attracting fungus or bacteria to your plant.

Most pet stores that sell supplies for reptiles and fish offer several food options for Pitcher plants.

Collecting insects for your plant is not always an easy and time permitting task. I prefer to buy feed at the pet store and opt for options that can be stored for long periods, such as freeze-dried mealworms. Here are some other options:

  • Freeze-dried mealworms
  • Freeze-dried bloodworms
  • Freeze-dried crickets
  • Wingless flies
  • Live crickets

The first three options are widely available and perfect for people that do not like handling live insects. When employing freeze-dried insects, I recommend rehydrating the bug before feeding your plant. Soak the bug in distilled water for 5-10 minutes. Then, remove from the water, dry off excess water with a towel, and feed your plant.

What You Should Never Feed Pitcher Plants

Make sure to avoid all the items in this list as food for Pitcher plants:

  • Hamburger
  • Chicken
  • Sausage
  • Salami
  • Raw meat
  • Candy
  • Fruit
  • Steak
  • Hotdog
  • Cheese
  • Any animal that is not an insect or a spider, such as:
    • Frogs
    • Mice
    • Birds
    • Fish

Even though you might have the temptation to feed your Pitcher plant human food, please, avoid doing so at all costs.

As a general rule, never feed human food to Pitcher plants. The digestive enzymes Pitcher plants produce are not strong enough to break up human food. Human food inside pitchers can rot and attract fungus, bacteria, and other pests.

Nepenthes and Sarracenia are carnivorous plants. They are equipped to consume insects, but they can also break up flesh. However, you should avoid feeding your plant any animal besides insects and spiders.

Can pitcher plants eat mice? Pitcher plants can consume mice and other small animals such as birds or frogs. In the wild, on rare occasions, they do consume prey other than insects. However, it would help if you did not attempt feeding your Pitcher plant mice as the animal might end up rotting inside the plant and creating a health hazard.

Larger animals won’t necessarily provide more nutrition than insects. For that reason, I always recommend a bug diet.

How to Feed Pitcher Plants

Feeding pitcher plants is an uncomplicated process. Here are the steps you need to take:

  1. Select the appropriate food option, preferably some type of insect
  2. If you selected a dehydrated insect, such as a freeze-dried mealworm, you must rehydrate the insect. Add a few drops of distilled water to the insect and let it rest for several minutes until the insect absorbs most of the water. Then, clean off any excess water.
  3. Grab the food with tweezers
  4. Drop the food inside the pitcher
  5. You can repeat the process multiple times and feed all the pitchers.
  6. Monitor the pitcher of your Nepenthes of Sarracenia for a few weeks.
  7. Repeat the process once or twice a month during the growing season.

When employing a new type of insect, I suggest monitoring the plant. Make sure most of the insect gets digested in the pitcher (at least the soft tissue). Also, keep an eye for leaf eaters, such as caterpillars, which might try to eat your plant.

Not everyone enjoys handling insects. Some of us do not feel comfortable with tasks that involved bugs. So, if that is not your cup of tea, you can let your plant capture its own bugs and skip the process altogether.

Do you need to feed Pitcher plants?

In the outdoors or a windowsill, Pitcher plants can capture their own bugs. They are effective bug catchers as they lure prey with sweet nectar.

When Pitcher plants capture their own bugs, there is no need to feed them manually. Still, you can do so safely without any issues. There is no harm in feeding your plant even if it already captured some insects.

Pitcher Plant Feeding Tips

Feeding Pitcher plants is not a complex process. However, making some small adjustments can ensure the feeding is successful.

  • Do not drop bugs or fertilizer in the soil: It is safe to feed pitcher plants and fertilize them if you are familiar with fertilizer concentration ratios. However, you must not drop any matter in the soil. Pitcher plants are sensitive to any type of minerals that can build up in the ground.
  • Employ bugs with lots of soft tissue: Some insects provide more nutritional value than others. Mealworms and bloodworms are very soft and contain tons of nutrients. Ant and gnats offer benefits, but they are pretty tiny for most pitcher plants.
  • Do not drop water inside the pitchers: When feeding, be careful not introducing water or any other element inside the pitchers that are not food. Adding water can dilute the digestive enzymes inside the pitchers and prevent your plant from consuming bugs. This article on when to fill pitcher plants with water can explain the process in more detail.
  • Change the food you employ if it attracts mold or causes the leaf to die.

Pitcher Plant Care Information

Care ConsiderationRecommendation
Lighting:This consideration is one of the most critical ones. Expose your plant to more than 10 hours of natural or artificial light. LED or fluorescent lights are suitable for indoor locations, 6500K is a suitable light temperature.
Watering:Only employ pure water sources such as distilled water, rainwater, or reverse osmosis water.
Water consistently and keep the soil humid at all times. Avoid the tray method for Nepenthes. Since watering your plant correctly is critical, this guide explains the process in great detail.
Soil:Do not employ standard potting media such as MiracleGro, cactus soil, or succulent soil. Instead, use nutrient-free carnivorous plant soil.
For best results, make sure you use soil that provides aeration and retains moisture. This article can help you select the best soil for your pitcher plant.
Humidity:Pitcher plants thrive in humid environments. A humidity level of over > 50% is optimal. Still, most plants can adapt to lower humidities and might benefit from a humidifier.
Trimming:It is not required to prune Pitcher plants, but you can remove dead leaves to promote growth. The link has instructions on how to do it properly..
Feeding:Outdoor Pitcher plants capture bugs on their own.
Indoor Pitcher plants need to be fed at least once a month to supplement their diet.
You can employ mealworms, bloodworms, crickets, flies, fish flakes, or other small insects.
Do not feed human food.
Fertilizers:Avoid fertilizing unless you have researched the detailed process. Maxsea fertilizer is a common choice.
Repotting:Repotting is not critical, but yearly repotting can promote growth.
Dormancy:Some pitcher plant varieties require a yearly dormancy. Nepenthes, tropical pitcher plants do not require dormancy.
Best indoor Pitcher plant varieties:Tropical Pitcher plants can grow in indoor growing.

Recommended Products for Growing Carnivorous Plants

Finding the best pots, lights, and soil for carnivorous plants is difficult. I have grown carnivorous plants for over 5 years, and these are the products I use. The links will take you to Amazon to view the prices and full specs:

How To Properly Water a Pitcher Plant to Keep It Healthy

Watering a Pitcher plant appropriately means finding the perfect balance between underwatering and overwatering. When I got my first Nepenthes, figuring out the watering and the other care considerations was not easy. After owning multiple healthy Nepenthes, I share what I have learned about watering pitcher plants in this article.

Pitcher plants must be watered often to keep the soil humid at all times without it drying out completely. Water until the soil is moist throughout and do not leave the plant standing in water for multiple days. Never employ tap water or bottled water; only use distilled water, reverse osmosis water, or rainwater.

Watering Pitcher plants incorrectly can kill Pitcher plants, and making small mistakes will slow down their growth. So, let’s get into the details of how to water your Pitcher plant to perfection.

Pitcher Plant Watering

At a glance summary: Pitcher Plant Watering

Watering FrequencyOnce or twice a week to ensure the soil remains humid.
Water TypeUse distilled, reverse osmosis or rain water.
Humidity RequirementDo not grow pitcher plants sitting in water as it causes rotting issues. Instead, water often and employ a humidifier.
Pitcher plant fluidDo not fill up the pitchers; healthy plants produce digestive juices in the pitchers.
Over watering signsYellow leaves and root rotting.
Under watering signsDried up leaves and stems of brownish color.

1- Get the correct water. Choosing the wrong water type can kill Pitcher plants.

Pitcher plants are unique in which type of water they require. Please do not attempt to water your Pitcher plant with tap water or bottled water, as it can be extremely harmful.

Pitcher plants are intolerant to nutrients and minerals. For that reason, they need to be watered with pure water sources that contain little to no additives.

Pitcher plants should only receive distilled water, reverse osmosis water, or rainwater. These three options are safe for pitcher plants and other carnivorous plants. Tap water and bottled water can be very harmful to pitcher plants, they cause mineral burns and mineral build-up in the soil.

If you have access to rain, rainwater is the free option. Distilled water can be found in grocery stores for about $1 a gallon. Reverse osmosis water is sold in water stores and some pharmacies. Personally, I use distilled water since it is cheap and available near me. Make sure to buy the distilled water jugs that are pure. Avoid any bottles that contain the works “additives for taste,” ” enhanced for flavor,” “electrolytes.”

Here is an example of distilled water.

2- Water Pitcher plants from the top until the soil is humid all around and water comes out of the drainage holes.

Pitcher plants thrive in humid environments. So, make sure to moisten the soil all around. The plant does not only need the water to produce food, but it likes the humidity of the soil.

Besides the watering, make sure you select the correct soil. This article can help you select soil for your pitcher plant.

3- Leave no more than an inch of water in the tray. Never water a pitcher plant before the tray has dried up completely, and never let the plant sit in water for long periods.

When watering your plant, make sure to employ a shallow tray and not fill it up too high. An inch of water is the recommended maximum depth because Nepenthes do not like to sit in water. If it gets full, empty the tray. It is better to let your plants sit in an empty tray than to let them sit in water for long periods.

The little water in the tray helps increase the humidity in the area and provides a reserve of water.

4- When the tray dries up completely, water the plant again until the soil is moist all around. Never let the soil dry out completely.

The watering frequency for your plant will vary throughout the year as temperature changes.

As a general rule, water Nepenthes every 3-4 days or when the soil is less humid. You must never let the soil dry out. Pitcher plants suffer greatly when the environment is dry as they are accustomed to humid habitats.

I water my pitcher plants twice a week year-round. Since my plants live indoors, I do not have to account for environmental changes.

Pitcher Plant Watering Tips and Advice

The list below covers critical points to consider when watering and caring for a pitcher plant. Pay close attention to all and ensure your plant stays healthy.

  • Employ pots with drainage: Technically, drainage holes are not a requirement for pitcher plants. However, employing pots with drainage lowers the changes of root rot and mold.
  • Select the appropiate soil: To ensure the soil does not retain moisture excessively, make sure to employ soil with good drainage. A combination of 3 part sphagnum moss and 1 part perlite or silia sand are appropiate.This guide can help you choose the best soil for your Pitcher plant.
  • Avoid terra cotta pots or clay pots: Such materials tend to absorb water from the soil. This characteristic is beneficial for many plants, but not for pitche plants. Those materials lower the humidity level and let too much water drain away from the soil. Also, terra cotta and clay tend to leach minerals to the ground. Plastic and ceramic containers are safe for pitcher plants.
  • Employ a humidifier instead of a mister: Misting your plant provides minimal benefits. Instead of misting, consider employing a humidifier to increase the water content in the air.
  • Monitor the water in your Pitchers: Check the pitchers in your plant and verify they contain liquid. A lack of water inside the pitcher is a sign of poor growing conditions. Is in many cases linked to uderwatering and lack of adequate lighting.
  • Check your plant for root rot: Even though it is not very common, pitcher plants can suffer from root rot. When repotting pitcher plants, remove all the old soil and replace with fresh media. Then, make sure to clean the roots and examine them to check for root rot. It is easy to spot: dark and smushy spots or sections in the bulb of the plant.
  • Research about dormancy needs: Some pitcher plants must undergo a winter dormancy. During dormancy, plants have different wtering needs. Make sure to adjust the watering frequency through the seasons.
  • Avoid experimenting with other water sources: Most boiled water, tap water, bottled water, filtered water, pond water, and river water is unsuitable for pitcher plants. Test the water before using (with a TDS meter) or stick to pure water sources.

Should Pitcher Plants Sit in Water

Many plants thrive in damped or waterlogged conditions when they are placed in trays with water. Pitcher plants can sit in water, but only for short periods.

There are two general methods to water plants. You can water them in the standard fashion by pouring water from the top. You can also water the plant’s tray and wait until the plant absorbs it. The second option is often referred to as “watering from the bottom” or “the tray method.”

Preferably, water pitcher plants from the top and do not allow them to sit in water for extensive periods of several days or weeks. Pitcher plants can die due to root rot caused by overwatering.

You can water the plant until some liquid starts coming out of the drainage holes in the water tray. You can let some water stay in the tray, but it should be minimal. Keeping an inch of water is acceptable and not a significant threat. Never refill the tray with water. Instead, let the tray dry out completely before you water.

For best results, avoid watering pitcher plants from the bottom. Such a method does not provide any benefit and can cause root rot.

How to Water Hanging Pitcher Plants

Watering a hanging pitcher plant is not too complex. Here are the instructions.

When watering a hanging pitcher plant, water the plant from the top until the soil is humid and some liquid starts scaping the drainage holes; you must water again when the soil is less humid but never let it dry out.

Since hanging pitcher plants do not have a water saucer, your plant won’t have a water reserve. Consider palpating the soil every 1 to 2 days and confirm the dirt is still humid. Check the ground often to prevent it from drying out.

Pitcher plants thrive in high humidity environments. Consider misting your plant to increase the relative humidity in the background.

How to Water Sarracenia

Sarracenias grow in very humid to damped soil conditions. They thrive in humid environments and need to be watered often. Also, they should only receive mineral-free water, such as distilled water, reverse osmosis water, or rainwater. Avoid employing tap water or bottled water for Sarracenies, as the high mineral content can harm them.

Make sure you have the correct type of water before you attempt to water your plant. You can buy distilled water in most big box stores for an affordable fee of 1 dollar a gallon.

Sarracenias potted in containers with drainage can be watered using the tray method. Place the pot in a tray. Then, fill the tray with water. The plant will absorb the water from the tray, and the soil will remain humid.

Since Sarracenias require very wet soil, you must fill the water trays quite often. Add a few inches of water and refill when the water is almost gone. The dirt must never dry out. Instead, it should resemble boggy conditions as Sarracenias thrive in bigs.

Without drainage holes, you can water Sarracenias from the top. Always water thoroughly until the soil is wet all around. Water again as soon as the ground gets less wet but never dry.

Should You Put Water Inside Pitcher Plants?

Pitcher plants produce fluids inside their pitchers to digest prey. The liquid inside their pitchers contains enzymes that help break up any bug that falls inside the pitcher.

In the wild, Pitcher plants produce their own fluids. However, in some environments, Pitcher plants won’t make their own fluids.

Do not fill your pitcher plant with water if it is not producing its own fluids.Pitcher plants produce liquid inside their pitchers when conditions are optimal. Improper conditions, such as a lack of humidity and insufficient water can cause a pitcher plant to stop producing digestive juices.

You can read this guide on Pitcher plant care and figure out what can improve your setup. Once your plant is happy, it will start producing fluids. The presence of liquid inside the pitchers is a sign of healthy growing conditions.

There are some scenarios where it is recommended to add water to Pitcher plants:

  • Some types of pitcher plants, such as sarracenia purpurea collect water with their pitchers. If the plant does not have access to rain water, you can consider adding some water. Use distilled water or rainwater to refill the pitcher
  • Add water if you spilled the water out of a pitcher. Most plant won’t produce fluids fast enough to recuperate a spill.
  • When pitcher plants are shipped in the mail they lose all their fluids. You can add water to ensure the pitchers remain healthy for a longer time.

How do you add water to pitcher plants?

First of all, make sure only to employ distilled, reverse osmosis, or rainwater. Anything else is unsuitable. Then, add water to the pitcher slowly until you reach no more than 1/4 to 1/3 of the pitcher’s height.

This section covered a summary of the matter. Learn all about when to fill your pitcher plant with water by reading this article. Also, it will give you easy steps on how to make your pitcher plant start producing fluids.

Pitcher Plant Care Guide

Care ConsiderationRecommendation
Lighting:Expose to more than 10 hours of natural or artificial light. LED or fluorescent lights are suitable for indoor locations.
Watering:Employ pure water sources such as distilled water, rainwater, or reverse osmosis water.
Water constantly and keep the soil humid at all times.
Soil:Do not employ standard potting media (enriched soil). Instead, use nutrient-free carnivorous plant soil.
Carnivorous plant soil can be made up of peat moss or sphagnum moss and perlite or silica sand. The ratios are not critical, but a 3 to 1 ratio of moss and perlite is a suitable mixture.
Humidity:> 50%
Trimming:Remove dead leaves to promote growth.
Feeding:Outdoor Pitcher plants capture bugs on their own.
Indoor Pitcher plants need to be fed at least once a month to supplement their diet.
You can employ mealworms, bloodworms, crickets, flies, fish flakes, or other small insects.
Do not feed human food. This guide can help you learn which bugs to employ and how to do it: What To Feed a Pitcher Plant: A Comprehensive List (Plus Feeding Tips)
Fertilizers:Avoid fertilizing unless advanced.
Repotting:Repotting is not critical, but yearly repotting can promote growth.
Dormancy:Some pitcher plant varieties require a yearly dormancy. Nepenthes tropical pitcher plants do not require dormancy.
Best indoor Pitcher plant varieties:Tropical Pitcher plants can grow in indoor growing.

What to Feed and Not to Feed a Venus flytrap- Complete List

There is a long list of food you can and can’t feed your Venus flytrap. I have grown Venus flytraps for over three years, and over time I have learned what works and what doesn’t. In this article, I share my advice.

Insects and spiders are suitable food options for Venus flytraps. The best feed alternatives are small live bugs that contain high nutrients. Freeze-dried insects are also an alternative. Always avoid feeding human food to Venus flytraps.

Venus flytraps do not need to consume insects to survive. However, consuming prey gives them extra nutrients, which fuel the plant to grow and divide. I have noticed many positive effects in Venus flytraps that consume insects frequently.

Make sure you choose an appropriate meal for your plant by learning about suitable options. Read each of the lists below for a successful feeding!

List of Food Options for Venus Flytrap

As you might notice from the list below, many arthropods are suitable to feed for Venus flytraps. Also, some less conventional options include plant food. Make sure to read the text below the list to learn which are the best and most practical alternatives for your specific scenario.

  • Flies
  • Cricket
  • Mealworms
  • Bloodworms
  • Fruit flies
  • Gnats
  • Ants
  • Rollie pollies
  • Beetles
  • Spiders
  • Ladybugs
  • Grasshoppers
  • Mosquitos
  • Fish pellets (link to buy)
  • Diluted MaxSea fertilizer (of these specifications)

The list above is not comprehensive. It contains a list of many suitable food options, but almost any bug will do. Still, I tried to keep the list short and emphasize the most common insects you can find around your home, garden, or in park. The trick is to find an insect that is small enough to fit entirely inside the trap. Also, preferably, you want to choose food that contains a lot of soft tissue and little to no hard shells. I buy these freeze-dried bugs in the pet store as they are very affordable, can last you for years, and are extremely nutritious. The link will take you to Amazon to review the prize, they are usually less than $10.

Do Venus Flytraps eat flies? Venus flytraps consume flies in real life. Venus flytraps attract flies with sweet nectar and trap them with their leaves. Then, they secrete enzymes to drown and consume the flies. Besides flies, Venus flytraps also consume many other types of insects and spiders.

Cricket, mealworms, and bloodworms are top food options for Venus flytraps and most carnivorous plants. They contain high protein content and a lot of soft tissue. All three can be purchased online or at pet stores. Generally, there are two options: live and freeze-dried bugs.

Can venus flytraps eat dead bugs? Dead bugs are suitable to feed Venus flytraps. The process of employing dead feed is slightly more challenging than using live bugs. Dead bugs can be found in gardens or homes and bought in pet stores; some standard options are crickets, mealworms, bloodworms, and fruit flies.

Live and dead bugs will work for Venus flytraps. Both options are almost equally nutritious. However, employing dead bugs is less natural. Therefore it requires you to add a few extra steps to the feeding process to trick your plant into consuming a dead bug. For example, you will have to rehydrate the insect with distilled water.

What You Should Never Feed Venus Flytrap

With so much misinformation out there about what to feed Venus flytraps. I felt highly compelled to emphasize what you should never feed your Venus flytrap:

  • Hamburger
  • Chicken
  • Sausage
  • Salami
  • Raw meat
  • Candy
  • Fruit
  • Steak
  • Hotdog
  • Cheese
  • Any animal that is not an insect or a spider

Can Venus flytraps eat human food? Human food is not appropriate for Venus flytraps or any carnivorous plants. Venus flytraps won’t be able to consume such complex food. Instead, after an unsuccessful digestion attempt, the leaf withers, and the food rots, attracting mold and bacteria.

Can Venus flytraps eat animals other than insects? Venus flytraps can digest meat from tiny animals such as rodents, birds, or frogs. However, this behavior is not very common. The diet of Venus flytraps in the wild is made up primarily of insects.

Never attempt to feed any animals besides insects or spiders to your Venus flytrap. Even though they can digest meat, the plant will most likely be unsuccessful at digesting the whole animal. And you will end up with a rotting trap.

Insects You Should Avoid Feeding to Venus Flytraps

Venus flytrap can consume almost any insect. However, some bugs are not the most suitable options. Here is a list of which ones to avoid:

  • Snails
  • Slugs
  • Caterpillars

Snails are not recommended to use as food for Venus flytraps. The plant won’t be able to digest the shell. And, only tiny snails will fit properly inside a Venus flytrap.

Can Venus flytraps eat slugs or caterpillars? Venus flytraps can consume slugs and caterpillars, but these insects present a challenge for Venus flytraps. Strong and desperate slugs or caterpillars can potentially eat their way out of the trap. Also, if the bug scapes, it can end up consuming the plant.

Venus Flytrap Feeding Instructions

Without proper instructions, it is not recommended to feed Venus flytraps. Feeding your plant incorrectly can end up harming it. For that reason, you must make sure to go over all of this information.

Venus flytrap capture and consume bugs to extract key nutrients. Such nutrients provide an extra boost for the plant but are not required for the plant’s survival, as most food is produced through photosynthesis.

Outdoors Venus flytraps can consume their own prey. And, sometimes indoors, they might have access to the occasional insect. Venus flytraps do not need a large number of insects to stay healthy. Sporadically feeding a venus flytrap can make a big difference, as long as done correctly.

Feeding Venus flytraps is a straightforward process that can improve the health of your plant if done correctly. These tips will help you ensure you do not make any beginner mistakes:

  • Always employ small insects that are a maximum of 1/2 of the size of the trap.
  • There is no need to feed venus fly traps when they live outdoors and have access to insects
  • Only feed one trap in the whole plant at a time
  • Feed a single bug once every 2-6 weeks
  • Avoid feeding venus fly traps during dormancy

The list below outlines the steps to feed a live bug to a Venus flytrap. You can also watch the video to get a live demonstration of the feeding process.

  1. Select an appropriate insect; one that has high nutritional content and can fit inside the trap of your plant.
  2. Locate the trigger hairs in your Venus flytrap. They are three thin filaments in each lobe of the trap.
  3. Use tweezers or your hands to grab the insect.
  4. Place the bug inside the lobes of your Venus flytrap. Make sure the bug is placed in the center.
  5. Brush the trigger hairs in the trap at least 2 times. After two touches the Venus flytrap should close on the insect.
  6. Wait until the trap closes and monitor it for the next 2-5 minutes. After a few minutes, the trap should be fully close.
  7. The venus flytrap start digesting the bug, it won’t reopen until at least a few days or a couple of weeks.

Leaves in Venus flytraps are ready to capture bugs when they just open. Then, after closing and reopening multiple times, leaves become exhausted and stop closing. When a leaf does not close, it is not a sign of poor health. It is completely normal behavior.

This article contains a summary of how to feed a Venus flytrap. However, there are more details to keep in consideration. Read the complete venus flytrap feeding guide to get all the information you need. And, check out my YouTube channel for more live examples: Venus Flytrap World.

How to Avoid Black Leaves After Feeding Venus Flytraps

Sometimes after feeding a venus flytrap, their leaves turn black. Why does that happen? And how should you prevent it? Here is an explanation.

Venus flytraps, like any other plants, shed leaves. When leaves get very old, they start to blacken or brown on the edges. Then, after a few days, the leaf ends up withering completely and turning to a dark, deep black color.

Even though most leaves wither due to natural causes, feeding a venus flytrap incorrectly can cause black leaves.

Employing a very large bug, overfeeding, or feeding during the incorrect season can cause black leaves in Venus flytraps. When the plant cannot digest its prey, it will let its leaves wither to save energy. Black leaves can be prevented by following certain care considerations.

Black leaves can be avoided by always employing an insect that fits entirely inside a trap, also by only feeding one trap at a time, and never feeding Venus flytraps during dormancy or when they are sick.

After feeding your plant, monitor the leaf you fed until digestion is complete. Then, you can verify the leaf remains healthy and ready for more bugs.

Other practices besides the feeding process can cause black leaves in Venus flytraps. For example, employing the incorrect water type, exerting too much stress, or unnecessary repotting can cause your plant to lose traps.

This section covered a short overview of the matter. But, there is a full article that can help you avoid black leaves from feeding your plant. Here is a link to that resource: Do Venus Flytraps Die After They Eat (plus easy fixes)

I love growing carnivorous plants and hope you can always keep your plants thriving. Here are some key articles you can read to ensure your plants stay healthy.

For general Venus flytrap care, you can download this care sheet: Venus Flytrap Care 101.

If you plan on growing Venus flytraps indoors, make sure you read this guide: How to Successfully Grow Venus Flytraps Indoors.

Recommended Products for Growing Carnivorous Plants

Finding the best pots, lights, and soil for carnivorous plants is difficult. I have grown carnivorous plants for over 5 years, and these are the products I use. The links will take you to Amazon to view the prices and full specs:

49 Unique Sundew Name Ideas

As a proud Sundew owner, I like to give my plants code names to identify them and to have a bit of fun.

I have made an extensive list of some name ideas for Drosera plants. Some names are associated with the name Drosera, others with Sundew or something in between. I hope the list serves you as an inspiration to name your plant. Some names are inspired by types of Sundew, such as binata, cape sundew, or spoon-leaf.

Here is a list of 49 Sundew name ideas:

  1. Dewie or dew
  2. Sunny D
  3. Bed head
  4. Mist or Misty
  5. Tangela (for the Pokemon fans)
  6. Mr Dew
  7. Sticky or Stick
  8. Gum
  9. Bug killer
  10. Flubber
  11. Crazy hair
  12. Risky Business
  13. Bug Threat
  14. Adhesive
  15. Glue
  16. Molasses
  17. Sunny or Sun
  18. [Inser bug name] Terminator or just Terminator
  19. Octopus
  20. Little Tree (great match for cape sundew)
  21. Mr. Palm
  22. Tentacles
  23. Medusa
  24. Gorgon or Gorgona
  25. Adele
  26. Capi
  27. Forrest
  28. Curls or Curly
  29. Lollipop
  30. Fork (great match for binata)
  31. Y Plant or Why Plant (also great for binata)
  32. Death wish
  33. Red or Reddish
  34. Magenta
  35. Drop or droplets
  36. Savage or Savage Flower
  37. Gnarly
  38. Ant Eater
  39. Dron or Drona
  40. Drooti
  41. Droo
  42. Drorit
  43. Sera (short from Drosera 😉
  44. Sphagetti
  45. String
  46. Snake
  47. Sol
  48. Spot
  49. Sue

I included several names that are a perfect fit for Cape Sundew since it is one of my favorite Sundews. Here is a picture of mine flowering a few months back.

The scientific name for Sundew plants is Drosera. The names Drosera or Sundew are used interchangeably. Currently, there are over 190 species of Drosera growing all over the world. Some common species are the Cape Sundew, Drosera Binata, Spoon-leaf Sundew, and Drosera Adelae.

Besides the scientific name, many people consider naming or taking their plant to create a connection and keep track of their needs. After choosing a name, make sure to write down essential care details, such as:

  • What variety do you own?
  • When did you get it?
  • Last repot date
  • Dormancy requirements
  • General state/ health of the plant through the seasons

After exploring the names, make sure to read the sections below and learn more about Sundew care, as keeping them alive and healthy can be a bit of a challenge.

Sundew Care for Beginners

This short guide explains the essential consideration you should keep in mind when growing Drosera. Read over all the items and pay close attention to the soil, watering, and lighting requirements, as those are incredibly critical.

Soil: Avoid standard soil mixes at all costs. Instead, employ carnivorous plant potting media. There are many different types of carnivorous plant media, but they have one thing in common: little to no mineral content.

You can buy carnivorous plant soil online or make it yourself. You must combine pure perlite or sphagnum moss with silica sand and/or perlite to make the soil. Here is a link to high-quality carnivorous plant soil you can buy online.

Lighting: Sundews need sunny environments to stay healthy. They can grow well under artificial or natural light as long as they have exposure to extended hours of lighting. Provide a minimum of 6 hours of light exposure every day. And, if possible, aim for 12+ hours of light. If you plan to employ artificial lighting, here are a few lights I have used for my Sundews and other carnivorous plants:

Watering requirements: Water your sundew with reverse osmosis water, distilled water, or rainwater exclusively. Never water your sundew with tap water or bottled water. Drosera needs water with little to no mineral content.

Consider employing the water tray method to keep the soil wet all the time. You can get the full instructions on effectively watering your plant in this article: Sundew Watering.

Feeding: Sundews grow larger and healthier when they have access to bugs. Sundews living outdoors capture their own food, but indoor plants might require your help. Use live bugs or rehydrated dead bugs to feed your plant every 2-4 weeks.

Use of Fertilizers: Mixing fertilizers and sundews is not a good idea. Avoid fertilizing Sundews to prevent damage. If you want to promote growth, consider feeding but not fertilizing.

Repotting: Avoid repotting your Sundew unless it is strictly necessary. There is no need to repot a Sundew every year; most varieties can live in the same pot for several years.

Trimming: Like all plants out there, Sundews shed leaves every once in a while. You can remove dead leaves by cutting them out. However, trimming is not required. Also, as a general recommendation, you must wait until the leaf has withered entirely before removing it.

Humidity needs: High humidity environments are optimal for Sundews. For best results, keep humidity levels between 40% and 70%. A humidifier is a practical solution to increase the humidity indoors.

Misting: There is no need to mist Sundews, and it can be counterproductive.

Dormancy: Some sundews require dormancy, which is a period of inactivity. Please find out the dormancy needs of your specific Sundew to keep it healthy. Plants that go dormant might require specific temperatures or lighting variations.

Stress: Avoid touching the leaves of your plant. It not only causes stress but also removes the dew drops. And, those droplets are very useful to capture and extract key nutrients from prey.

Fun Projects With Sundew Plants

  • Feeding: Feeding your Sundew is very easy and can be a unique experience. You can buy small live crickets (or other small insects) from almost any pest store and give your plant a proper meal. Place the bug in your plant’s leaf, and let your plant do the rest.
  • Mutiple Propagation: Do you want to grow your plant collection? Consider propagating your Sundew. You can propagate it through seeds, after your plant produces flowers. A single flower stalk can produce a bunch of of flowers with hundreds of seeds. Also, leaf cuttings are an effective and fast method to clone your plant.
  • Use for pest control: Have you struggle with gnat or fruit fly infestations? Sundews are effective bug controllers for tiny insects. Study the possibility of placing your plant strategically where it can have plenty of access to bugs and reduce the insect population in your home or green house.
  • Make a bog garden: Sundews are great candidates for bog gardens. You can buy bog garden kits or make your own by combining many different types of sundews. Different shapes, colors, and textures are a perfect combination for a show-stopper bog garden. Also, consider mixing in other types of carnivorous plants, such as venus flytraps, Sarracenia, and Pitcher plants.

Make sure to check out my other articles on Drosera. They have a lot of helpful information: